Showing posts with label veggie tales. Show all posts

Tuesday, April 26, 2011

Two Easy Meals from Marian Burros

When I lived in New York City in the early 1990s, I became quite fond of Marian Burros's New York Times column, Plain and Simple. When we got married in 1996, I was thrilled when among our wedding gifts were a couple of her cookbooks, including 20-Minute Menus, originally published in 1989. These two dinners are not in heavy rotation chez nous, but they do periodically reappear. I'm not including any pictures, because the visual appeal of these dishes is quite limited.
Tortilla-Chip Casserole
adapted from Marian Burros's "Plain and Simple" column in the New York Times

This recipe originally called for using a half-pound ground turkey breast; I like it better as a vehicle for leftover roast chicken.

1 t olive oil
meat of some kind (leftover roast chicken, ground turkey or beef, leftover roast beef), optional
1 jalapeño, or to taste, optional (or a little cayenne)
1 large clove garlic, minced
1 medium onion, chopped fine
1 bell pepper, seeded and chopped
1 t ground cumin
1/2 t ground coriander
1 sm can (or half a Pomi box) diced tomatoes, drained
1/4 t salt
Freshly ground pepper to taste
1 16-oz can low-sodium black beans, drained and rinsed (or refried beans)
3 oz grated (sharp) cheddar cheese
a few handfuls of tortilla chips, or a couple of corn tortillas, torn into pieces

Heat oil in large nonstick skillet. Cook meat if you're starting with raw meat, until no longer pink. Remove excess grease if any, then add onions and peppers and sauté until softened and starting to brown. Add garlic and spices and cook for 30 seconds more, until they're fragrant. Add tomatoes (and leftover meat, if using) and cook a few minute to blend flavors. Remove mixture from skillet and put beans in bottom of pan, then top with chips, meat/veggie mixture and cheese. Cover and cook a few minutes, until cheese is melted and everything is heated through. Serve with sour cream and fresh chopped cilantro, and steamed broccoli or cauliflower on the side.

Curried Red Lentils and Cauliflower with Cashews
adapted from 20-Minute Menus by Marian Burros

8 oz red lentils
1 medium-large onion, chopped coarsely
1 large clove garlic, minced
2 T olive oil
1 t coriander
1 t cumin
1 t turmeric
1/2 t chile powder
1/4 t cardamom
1/4 t cinnamon
1/8 t ground cloves
1 small to medium head cauliflower, broken into florets
1 C chicken stock
3 oz tomato paste
1/2 C unsalted roasted cashews
plain yogurt or sour cream

In covered pot, bring lentils to boil in plenty of water to cover. Cook about 10 minutes, until soft, then drain (watch pot carefully--I don't think I've ever succeeded in not letting it boil over).

Mix spices together in a small bowl.

Heat oil in dutch oven until shimmering, then sauté onion until softened and starting to brown. Add garlic and spices and continue cooking until fragrant, about 30 seconds. Stir in tomato paste and cook another 30 seconds, then stir in chicken stock, scraping brown bits from bottom of pan. Stir in cauliflower, cover pot and bring to a boil. Reduce heat and simmer, covered, until cauliflower is tender and starting to fall apart. Stir in lentils, simmer another couple minutes to blend flavors, then remove from heat. Serve over steamed rice, topped with cashews and yogurt/sour cream.

Monday, January 24, 2011

Black Bean, Kale and Butternut Squash Stew with Quinoa

I made this recipe earlier this week for dinner. The previous night I made Swedish Meatballs on my sister's recommendation, and they were pretty darn delicious but very, very rich (I could really tell how rich when I got out the leftovers for lunch the next day and there was white congealed fat around the edges of the container). Something less heavy was called for, and I wanted to use the quinoa, kale and butternut squash I already had on hand. I didn't have a jalapeƱo, so I added a pinch of cayenne with the other dry spices. I didn't have canned tomatoes, but I did find at the back of the fridge about a third of a pint of Emerald Valley Medium Salsa that needed to be used up, plus I tossed in a few cubes of frozen tomato juice. I used chicken stock instead of veggie broth, and I tossed in a couple cups of frozen corn at the end. Served over the quinoa, topped with the cilantro, plus grated cheese, sour cream, and crumbled tortilla chips, it was delicious, satisfying but not dense or rich. And if you follow the original linked recipe and forgo my animal-y alterations, it's even vegan.

Sunday, November 28, 2010

Thanksgiving sides and desserts

Thanksgiving was at J&J's house this year, so they provided turkey and trimmings, and we brought side dishes and a dessert. I brought three sides: Roasted Green Beans, Cocoa-Roasted Butternut Squash and Cauliflower and Brussels Sprout Gratin. The beans and gratin were total winners (thanks to my sister for pointing me toward the gratin recipe!), but the squash wasn't nearly as good as it sounded.
Cocoa-Roasted Butternut Squash
adapted (mostly to shrink quantities--the original recipe would feed an army) from a recipe printed in Oregonian FOODday, November 16, 2010

3 T unsweetened cocoa powder
1 t salt
pinch cayenne pepper, or to taste
scant 1/4 t cinnamon
1 t granulated sugar
2 lbs butternut squash, peeled, seeded, and cut into one-inch chunks
1 1/2 T vegetable oil
1/4 C toasted slivered almonds

Preheat oven to 375. Combine cocoa, salt, sugar and spices in a small bowl. Toss squash with the oil, then with the cocoa-spice mixture. Arrange squash on foil-lined baking sheet, then roast for 40-45 minutes or until tender. Transfer to serving dish and sprinkle with almonds.

Perhaps I ended up with a particularly flavorless squash, but this didn't taste like mole sauce (as the article had promised). If I were to try it again, I would use less cocoa and swap the teaspoon of white sugar for a couple tablespoons of brown.

The dessert was a much less equivocal success. A few years back, a friend sent me a recipe, originally from Fine Cooking magazine, and I finally got around to making it.
Chocolate-Glazed Peanut Butter Tart
adapted from Fine Cooking Winter 2005

Crust:
1 C cookies ground in a food processor (about 25 chocolate wafers, 8 whole graham crackers, 35 Nilla wafers)
2 T granulated sugar
3 T unsalted butter, melted

Preheat oven to 350. Mix crumbs, sugar and butter until well blended (I do it all in the food processor to avoid dirtying another bowl). Press crumb mixture into a 9.5-inch tart pan, using a straight-sided steel measuring cup. Bake about 10 minutes, then let cool.

Filling:
1 1/2 C whole milk
1/4 t salt
3 egg yolks
1/3 C light brown sugar
4 t flour
1/2 C creamy natural peanut butter
1/2 t vanilla

Bring milk and salt to a simmer over medium heat, stirring occasionally. Meanwhile, in a small bowl, whisk the egg yolks, brown sugar, and flour until well blended. Slowly add hot milk, whisking constantly. Pour mixture back into saucepan, and cook over medium heat, whisking constantly, until it thickens and comes to a full boil. Boil one minute, then remove from heat and whisk in peanut butter and vanilla. Pour hot custard into the crust and spread evenly. Press a piece of plastic wrap directly onto the surface to prevent a skin from forming. Refrigerate until cold, at least two hours.

Glaze:
3 oz bittersweet chocolate, chopped
1/4 C unsalted butter, cut into pieces
1 T light corn syrup

Melt chocolate and butter in a double-boiler or bain-marie, then whisk in corn syrup until smooth. Carefully remove plastic wrap from filling, then drizzle the glaze over the filling and spread to cover whole surface of tart. Refrigerate until glaze is set, at least 30 minutes or up to 12 hours.

Friday, June 4, 2010

Basic Veggie Risotto

I make this for our family on a semi-regular basis, since it's a big hit with the kids and is adaptable to what we have on hand. Many recipes for risotto recommend constant stirring, but I never understood why that was until I tried making it in a non-nonstick pan. If you're lazy like I am, skip the fancy risotto pan and stick with the nonstick skillet.
Basic Veggie Risotto

1-2 T olive oil
1-2 cloves garlic, minced or pressed through garlic press
1 1/2-2 C arborio rice (or whatever your family needs)
kosher salt and freshly ground black pepper
large pinch saffron threads, crushed
1/2 C dry white wine, if you have it
6-8 C low-sodium chicken or vegetable broth (this time I used the leftover strained pan juices from the French Roast Chicken in a Pot we had a few days earlier, about a cup diluted with water to make a quart of broth)
vegetables of your choice, steamed until just tender (this time I used carrots, broccoli, kale, asparagus and peas)
a few ounces Parmigiano Reggiano, grated
1-3 T unsalted butter, cut into chunks

Put olive oil and garlic into large nonstick skillet and heat over medium-high heat until garlic just starts to sizzle (don't let it get brown; browned garlic gives a bitter flavor).


Add rice to pan with 3/4 t or so of the kosher salt and a good amount of freshly-ground black pepper. Stir for a few minutes, until rice grains are translucent with white centers and make a sound like wet sand when stirred.


If using wine, add it now, along with saffron threads. Cook until wine is mostly absorbed and alcohol smell has dissipated, then add broth to cover, stirring well. Keep stirring occasionally, making sure rice is cooking evenly, and adding additional broth (and perhaps a little salt) as needed.


While rice is cooking, steam veggies until just tender, starting with the carrots, which take longest to cook. When veggies are done, remove from pan so they don't keep cooking while they wait for the rice to finish.


Rice is done when kernels no longer have hard centers and the mixture seems creamy (from the starch the rice has given off while it cooks). It should be a little looser than you want it to end up, as the rice will continue to absorb liquid as it cools. Remove the pan from the heat and stir in the butter and cheese, then fold in the vegetables (I put in the peas while still frozen, which helps cool the risotto to kid-edible).


Adjust seasonings, let rest for just a couple of minutes, then serve.

Sunday, December 6, 2009

Classic Stuffed Turkey

We had a small, quiet Thanksgiving dinner, with just our family and J&J's. It was my turn to host, so I was in charge of turkey, stuffing, gravy, potatoes and one dessert, with J bringing sides, rolls and another dessert. I love stuffing, so I made two whole batches, not realizing that J&J's kids wouldn't eat any (!). I was thinking about the copious amount usually consumed by my brother Rib. I love having at least part of the stuffing cooked inside the bird, so I wanted a recipe for a stuffed turkey that would still turn out moist and delicious, and decided to try the latest turkey guidance from Cook's Illustrated.


Table setup with kissing corn (kids' table visible through doorway at center-right).


Table setup with pressed-glass turkey candle holders and linens and silver from my grandmother.

Wild Rice, Apple and Dried-Cranberry Stuffing from Gourmet (made by me)


This stuffing was very good--it's pretty much just a basic bread stuffing with sautéed celery and onion and fresh parsley, sage & thyme, then some cooked wild rice, diced apple and dried cranberries stirred in. I would recommend either cooking this in the bird or keeping it covered the whole time it is in the oven--the wild rice on the edges got a bit crunchy/chewy.

Rolls rising (made by J from my great-grandmother's recipe).


Swiss Chard and Sweet Potato Gratin from Smitten Kitchen (made by J). This was delicious but very rich. Half a recipe would have been plenty for our small two-family group (again, the kids didn't eat much of it).


Old-Fashioned Stuffed Turkey from Cook's Illustrated's November-December 2009 issue.


This recipe calls for a 12-15 lb turkey, and mine was near the upper limit of that range (I did want some leftovers). A sidebar in the magazine lists the "secrets" to a great old-fashioned stuffed turkey:

1. Dry brine (rubbing turkey with salt under the skin and in the cavity 24-48 hours ahead of cooking)
2. Stab the fat deposits with a skewer to aid the rendering of fat
3. Dry rub with baking powder and salt just before roasting to encourage browning (I did not do this step, as in an earlier recipe trial of a roast chicken recommending this technique, it imparted a slight chemical taste)
4. Bard the turkey by draping strips of salt pork on its back while roasting
5. Combine stuffing cooked inside and outside the turkey (doesn't everyone do this anyway?)
6. High-heat finish for the last 45 minutes to crisp the skin.

Now, there were a couple of other small ways (in addition to number 3 above) in which I deviated from the recipe. Nevertheless, the turkey was moist and flavorful, giving off lots of fat and basically no juices during its roasting time (I poured off the grease and scraped up the brown bits to dissolve as much as I could into the gravy, straining to get out the undissolved bits; my brother pronounced it the "best gravy ever"). Here's how I did it:
Old-Fashioned Stuffed Turkey
adapted from Cook's Illustrated Nov-Dec 2009
Serves 10-12

1 12-15 lb turkey
3 T kosher salt
12 oz salt pork, cut into 1/4"-thick slices and rinsed

onion, celery, carrot and a few sprigs fresh thyme for gravy neck stock, chopped roughly

Your favorite stuffing recipe (besides the wild rice one linked above, I made a traditional stuffing with sautéed onions and celery and fresh parsley, sage and thyme. I did not make homemade bread for the stuffing this year, and missed it.)

Now, two days before Thanksgiving, having already put the turkey in the fridge to thaw several days before, you go to pull out the giblet/neck packet and salt the turkey according to the recipe. After having removed it from its wrapping, you discover that the bird is still frozen solid in the middle and completely unwilling to birth its packet. You panic and put the turkey on a rack over a broiler-pan bottom in the fridge, hoping that the direct contact with the fridge air will thaw it sufficiently by the next day.

One day before Thanksgiving, the giblet/neck packet is just barely able to be pried out of the cavity. You heat a little oil in a saucepan and brown the snot out of the neck, then sauté the chopped vegetables in the same pan, scraping up browned bits. Add the neck back in, add water to cover, and simmer for a few hours. Return to still very, very cold turkey, and rub 3 T kosher salt in cavity and under skin of breasts and legs, trying mightily not to tear it where it's become slightly dried-out and fragile from its uncovered overnight fridge stay. Cover it with plastic wrap, put it back in the fridge, and hope for the best.

Thanksgiving morning, get the turkey out of the fridge, remove plastic wrap, and hope it comes to something resembling room temperature by roasting time. Use a skewer to poke lots of little holes (1" apart) in all the thick, fatty parts of the skin on the breasts, thighs, legs and back. Prepare stuffing, then line cavities with cheesecloth and put in as much stuffing as will reasonably fit, leaving the rest in a bowl in the refrigerator. Preheat oven to 325 degrees. Place turkey breast-side down on a rack in a roasting pan and drape back with slices of salt pork.

Roast breast-side down until thickest part of breast measures 130 degrees, 2-2.5 hours. Remove from oven, close door, and increase temperature to 450 degrees. Transfer turkey in rack to another pan, remove and discard salt pork, remove stuffing bag, and turn turkey breast-side up. Empty stuffing back into reserved stuffing in bowl and mix together, then put in large casserole dish. Pour drippings from pan into strainer over fat separator, scraping pan with a silicone spatula.

When oven is up to temperature, return turkey in rack to roasting pan and roast until skin is brown and crisp, thickest part of breast is 160 degrees, and thickest part of thigh is 175 degrees, about 45 minutes. Transfer turkey to carving board and let rest 30 minutes.

Reduce oven temperature to 400 and bake stuffing until it reaches 165 degrees in the center. Make gravy from defatted drippings, neck stock, and a well-mixed slurry of flour and water, plus some of the potato cooking water if desired, seasoning to taste (probably won't need much salt!).

This was a fabulous turkey, in spite of the stressful moments that occurred in its preparation. That overnight uncovered fridge stay that dried out the skin some made it roast up perfectly, cracklingly crisp--my brother said it was like pork rinds only better--but left the flesh moist and delicious. This is a great, easy, non-chemical-y way to get the skin really, really crisp. It did make it quite a bit harder to rub the salt under the skin, but if I'd been able to do the salting before the drying of the skin, maybe that would solve that problem? Next time will tell.

For dessert, J brought a perfectly-delicous Costco pumpkin pie and her homemade pecan dacquoise pie. and I made Banana Chocolate Bread Pudding, using leftover challah from previously having made Pumpkin Pie Bread Pudding with Bourbon Toffee Sauce for a friend. The challah wasn't left over, per se, because I did use a whole loaf for the first bread pudding, but it was left over because, after searching high and low for already-baked challah, I made my own. I guess in the middle of Thanksgiving week, all the bakeries are turned over to dinner rolls, and there wasn't any challah. I suppose I could have substituted, but I wanted to follow the recipe as closely as I could, so there I was, two nights before Thanksgiving, madly making challah late in the evening and about killing my KitchenAid in the process. Anyway, both of them turned out delicious, though I should definitely have used less than the whole loaf for the banana pudding.

And after all that effort over the bread, I couldn't muster up a couple tablespoons of bourbon for the toffee sauce, so I used Kahlua instead. Next time for the bourbon.

Monday, October 26, 2009

Hail, Gourmet!

I had printed off a couple of recipes from Gourmet, based, on recommendations of friends and other food bloggers, and have finally got around to making them. I hope they don't disappear from the web any time soon, but if the links stop working, let me know and I'll type them in.

First up, Sweet Potato Gnocchi with Fried Sage & Chestnuts. Based on my experience with adding sweet potatoes to traditionally all potato recipes (as in Orange Mashed Potatoes, Orange Potato Gratin, and Orange Latkes), I had an inkling it would be good. I made it almost exactly as written, except that I didn't roll the dough into tiny balls before rolling down the back of a fork (I didn't care if they weren't that uniform). Plus I didn't shave the chestnuts, because my chestnuts (which I had roasted, peeled, and frozen) didn't shave, but crumbled. Oh well! Anyway, this recipe was fantastically delicious, and snarfed up by all eaters, especially my mother-in-law.


Then I made not just one, but twoPear Butterscotch Pies. For my all-butter pastry, I used my adapted version of the Cook's Illustrated foolproof vodka pie crust. It was really, really good, and not nearly as sweet as the name might make you think. The brown sugar and pear juices combined to bake into a brown, almost custardy, goo. A la mode, this pie was darn-near divine.

Wednesday, September 16, 2009

The Last Gasp of Summer

We had beautiful summer weather last weekend, so I wanted to take advantage of our bounteous local harvest and have one last patio meal. Pulled pork, buttermilk coleslaw, sautéed zucchini and corn, roasted heirloom tomato tart (this time with chèvre!), and plum cake and Honey-Caramel Peach Pie à la mode for dessert. Corn, zucchini, tomatoes and peaches--can't get much more summer than that!

The tomato tart:


Buttermilk Coleslaw
adapted from Cook's Illustrated Jul/Aug 2002

I doubled the recipe, using a whole small head of lavender cabbage that weighed just under 2 lbs.

1 lb cabbage, shredded fine (quarter, core, then shred in food processor)
Salt
1 medium carrot, shredded (I used my julienne peeler)
1/2 C buttermilk (I was just shy and used a little plain whole-milk yogurt to make up the difference)
2 T mayonnaise
2 T sour cream
1 small shallot, minced (about 2 T)
2 T minced fresh parsley leaves
1/2 t cider vinegar
1/2 t sugar
1/4 t dijon mustard
1/8 t freshly ground black pepper

Toss shredded cabbage and 1 t salt, then put in a colander over a bowl. Let stand 1-4 hours until cabbage wilts (it never seemed all that wilty to me, and it didn't express any water). Rinse cabbage under cold running water, then press gently and pat dry with paper towels (don't wring). Put cabbage and carrot in a large bowl.

Stir remaining ingredients together in a small bowl, then pour over cabbage and toss to combine. Refrigerate until chilled, then serve.

Sautéed Zucchini & Corn
adapted from recipes in Cook's Illustrated and Cook's Country
makes a side dish for 8-10


a bunch of zucchini (like, 8 small--I used 2 large and 1 medium)
3 T unsalted butter
1 medium shallot, minced
4 ears sweet corn, kernels removed with a serrated knife
2-3 T chopped fresh basil
1 T olive oil
salt & pepper

Grate zucchini (I used the food processor). Toss with 1 t salt, and put in a colander over a bowl. Let sit for 30-45 minutes. It will give off a lot of water. Then squeeze out even more water by wrapping zucchini in a triple layer of paper towels and wringing (in two batches if necessary). Toss with olive oil and corn in a large bowl.

Heat butter over medium-high heat in a nonstick skillet. When foaming subsides, sauté shallot until just soft. Add zucchini and corn and sauté until tender. Top with basil and salt and pepper and serve.

The pie (my brother said it was the best crust he's had in his whole life!):

Thursday, August 20, 2009

Summer Picnic Fare

Love me a good picnic. We recently attended one with just the right number of people (6 families, plus a few extra folks), just the right weather (not too hot, not too chilly), and lots of good food. I took three things to share: Picnic Chicken, Three-Bean Salad, and The Thin (crispy buttery chocolate chip cookies--perfect if, like me, that's the kind of chocolate chip cookie you like, although even the folks who claim to love gooey chewy cookies didn't exactly struggle to get them down). No pictures because we were in a hurry to get out the door, as usual.
Picnic Chicken
adapted from Cook's Illustrated Jul/Aug 2006

5 lbs or so chicken pieces (I cut up two 3.5-pounders, saving the wings and backs for stock), breasts cut into 2-3 pieces, trimmed of excess fat and skin (leave some skin on each piece, just cut off the hanging fatty flaps), short slits cut into remaining skin but not into the flesh

2 T kosher salt
3 T brown sugar
2 T chili powder
2 T sweet paprika
2 t ground black pepper
1/4-1/2 t cayenne (less if you're serving kids)

Mix dry ingredients, then coat chicken pieces, under skin as well where possible without completely dislodging skin. Put chicken on wire rack over rimmed baking sheet, tent with foil, and refrigerate 6-24 hours. It must be at least six hours, or the moisture will not have had a chance to migrate back into the meat (I can explain at greater length if you're puzzled, but trust me, this is a crucial step to the recipe and cannot be shortcutted).

When ready to cook, heat oven to 425. Roast chicken until thickest part of smallest piece reaches 140 on an instant-read thermometer, about 14-20 minutes. Increase oven temperature to 500 and roast until thickest parts of breast pieces reach 160, 5-8 minutes, removing pieces as they finish and transferring to clean wire rack. Roast dark meat until thickest parts register 170-175, 5 minutes or so longer. Transfer to rack and let cool completely before refrigerating or serving.

The next time I make this recipe, I will probably eliminate or nearly so the cayenne pepper (too spicy for the kids), and I will either try it on the grill or use a broiler pan. Cleaning the baked-on chicken juices from my cookie-cooling rack was a major chore (lovingly undertaken by my husband). And for sure I will line whatever I cook it on with foil--my cookie sheet will probably never recover.
Three-Bean Salad
adapated from Cook's Illustrated Jul/Aug 1999

1 C red wine vinegar
3/4 C sugar
1/2 C canola oil
2 medium garlic cloves, minced or pressed through garlic press
1 t salt
freshly-ground black pepper
8 oz fresh green beans, stemmed and cut into one-inch pieces
8 oz fresh yellow wax beans, stemmed and cut into one-inch pieces
1 15-oz can red kidney beans, rinsed and drained
1/2 medium red onion, chopped fine
1/4 C minced fresh parsley leaves

Heat vinegar, sugar, oil, garlic, salt and pepper in a small saucepan over medium heat, stirring occasionally, until sugar dissolves. Transfer to a large nonreactive bowl and cool to room temperature.

Blanch green and yellow beans in salted boiling water for 3-5 minutes, depending on thickness of beans. Shock in ice water to stop cooking, then drain well.

Add all beans, onion and parsley to dressing and toss well to coat. Cover and refrigerate overnight to blend flavors, then let come to room temperature at least 30 minutes before serving.

Pasta with Summer Squash Redux

I made this recipe again, and I remembered to take a picture. Just barely (this is the last of the leftovers).


Too bad the kids are on an anti-zucchini kick.

Sunday, August 9, 2009

Rice Salad

Tonight we had some of the sockeye salmon my dad caught in Alaska on his birthday fishing trip, fresh sweet corn on the cob, and a rice salad with cauliflower, currants, almonds and peach. Amazing what happens when I decide what I want to make before sending Mavis to the farmers' market.


Curried Rice Salad
adapted from Cook's Illustrated Jul/Aug 2000

1 C basmati rice
1 1/2 t salt

Bring a few quarts water to a boil in a large saucepan. Heat a large nonstick skillet over medium heat until hot, then toast rice in dry skillet for five minutes or so. Carefully add rice and salt to boiling water and cook, uncovered, 10-12 minutes until rice is tender but not soft. Drain rice in fine-mesh strainer or colander, then spread in a foil-lined baking sheet to cool while preparing other ingredients.

2 T canola oil
2 C small cauliflower florets (about half a small to medium head)
1 T curry powder
1 t salt
1/4 C currants
1/2 C chopped roasted almonds (recipe originally called for cashews)
1 medium peach, peeled and diced (recipe originally called for mango)
3 T minced chives (I had considerably less than this because mine dried up in the heat)
1/4 t ground black pepper

Heat oil in skillet over high heat until just shimmering. Add cauliflower, curry powder, and 1/2 t salt and cook, stirring, for about a minute, until curry coats cauliflower. Add currants and 1/4 C water, stir, cover, reduce heat slightly, and cook for a few minutes, until water evaporates and cauliflower is tender. Transfer cauliflower to a large bowl, stir in rice and other ingredients, including remaining 1/2 t salt. Let stand 20 minutes to blend flavors before serving.

Thursday, August 6, 2009

Chicken & Potatoes a New Way

As you may have heard, last week in Portland was too hot to do much of anything, let alone cook. But I had all this food Mavis had bought, and I needed to cook it. Plus, The Laundry Queen and her family were coming to visit, and I didn't feel like serving or eating anything we might have gotten for takeout. So, roast chicken and scalloped potatoes it was. Not really summery, except that we cooked it on the grill.

There's nothing particularly difficult about roasting a chicken on the grill. Prepare it the way you would to roast in the oven. For me, that usually means just a little salt and pepper, and maybe a little softened butter. This time I happened to have some leftover all-purpose grill rub (I'm not even sure what was in it any more), so I rubbed it all over the skin and under the skin on the breast.

Start a chimney full of briquettes, and when they're ready spread them evenly on both sides of the grill, leaving a space wide enough for the chicken in between. To make absolutely sure they'll last long enough for the chicken, spread a few unlit coals over the top. Heat, scrape and oil the grate, then place the chicken breast side down and close the lid, with top vents half open. For a chicken around four pounds (the size I usually do, which usually makes two dinners for us), leave it alone for a half-hour. Flip it over on its back and cook, lid closed, at least another half-hour before taking its temperature. When it's 165 in the breast and thigh, pull it off and tent with foil to rest.

Now for the potatoes. They were inspired by a recipe The Laundry Queen saw on the Pioneer Woman blog.
Grill-Scalloped Potatoes

2.5 lbs russet potatoes, peeled and cut into one-inch cubes
1-2 garnet sweet potatoes, peeled and cut into one-inch cubes
1 medium yellow onion, peeled and cut into wedges
1/2 t sweet Spanish paprika
1/2-3/4 C heavy cream
kosher salt and freshly ground white pepper to taste
several tablespoons butter

Toss all ingredients except for butter in a large bowl until thoroughly combined. Divide evenly between two or three large pieces of heavy-duty foil, put a blob of butter (2-3 T per pouch) on top, and bring sides up to make fairly-well-sealed-but-still-openable and fairly flat pouches. Put them directly over the coals on either side of the chicken when you flip the chicken over. Roast until tender and starting to brown, stirring once or twice during cooking.

Monday, July 20, 2009

Northwest-Indian Fusion

Or at least my attempt. For our book group meeting to discuss White Tiger by Aravind Adiga, I chose an Indian-inflected menu. Oh, it was nothing like the women in Jhumpa Lahiri's The Namesake, slaving all morning to put on a lunch spread of many dishes. I made a Salmon Biryani, substituting skinless Columbia River Chinook filets for the chicken in the Chicken Biryani recipe, skipping the browning step. I'm pretty sure they don't have salmon in India (somebody please correct me if I'm wrong), but if they did they would put it in a biryani like this. The raita (yogurt sauce as it's called in the recipe) was divine as always. I served it with Curried Cauliflower:
Ginger-Curry Cauliflower
adapted from Real Simple magazine

1 head cauliflower, broken into bite-sized florets
2 T olive oil
1 T unsalted butter
2 t grated fresh ginger root
2 t curry powder
1 t turmeric
1/2 t kosher salt (recipe originally calls for 1/4 t, but it wasn't enough)
1/4 C fresh bread crumbs
1/4 C chicken broth (optional; I've made it both with and without and it turned out fine either way)
1 T fresh parsley, minced (optional; if I'd remembered to save any of the mint and cilantro from the other menu items I'd have used that instead)

Steam cauliflower until fork tender. Heat oil and butter in a large skillet over medium heat. Add ginger, curry powder, turmeric, and salt and cook for 1 minute, stirring frequently. Add bread crumbs and cook another minute. Add cauliflower (and broth, if using) and cook until any liquid is absorbed and cauliflower is well-coated. Remove from heat and toss with parsley or other herbs, if using.

We had a palate-cleansing simple salad of baby greens, dried cherries and hazelnuts in balsamic vinaigrette, then finished with mixed berries (raspberries, boysenberries, marionberries and blueberries, purchased at the farmers' market that morning) over vanilla ice cream. Yum!

Saturday, April 25, 2009

Salmon-Asparagus Salad

I've made something similar to this in the past, but somehow never posted about it. I was in Utah this weekend and needed to do something with a filet of Costco salmon. Here's my solution, which also uses fresh in-season asparagus. In late summer and fall, when asparagus isn't so plentiful, it tastes great with green beans.


Salmon-Asparagus Salad
loosely inspired by The Barefoot Contessa Cookbook

1 filet (approx 2.5 lb) salmon
1 large bunch (2 lb? How big are the packages at Costco?) asparagus, ends snapped off and snapped into two-inch pieces

Spray salmon with olive oil and sprinkle with salt and pepper and bake at 400 degrees until just firm and opaque throughout. Let cool to room temperature and then refrigerate. Blanch asparagus pieces in boiling water for 30-90 seconds, depending on thickness of spears. Let cool and refrigerate also.

juice of one lemon
twice as much olive oil as lemon juice
1 pkg fresh dill, leaves stripped and minced (about 3-4 T)
3 T capers, minced
2 ribs celery, diced fine
1/2 red onion, chopped fine
1/2 or more English cucumber, cut into quarter-rounds
salt and freshly ground black pepper to taste

Mix lemon juice, olive oil, dill and capers with some salt and pepper, then stir in remaining ingredients and reserved salmon and asparagus. Adjust seasonings and serve.

Saturday, January 24, 2009

Life Without Corn

Our book group book this time around was The Omnivore's Dilemma by Michael Pollan. Inspired by the first section of the book, I thought I should try to avoid corn by-products in today's menu. It really wasn't all that hard--just avoid processed foods and non-organic meat. It's a good thing no one in attendance had nut allergies, since three different nuts were featured in three dishes today.

Hazelnut-Crusted Wild Alaskan True Cod with Cranberry Jelly
Nutted Wild Rice with Blood Oranges
Roasted Green Beans

Wintertime Chocolate-Caramel Tart
Tillamook Vanilla Bean Ice Cream

The fish was easy. I mixed some ground hazelnuts with about the same amount of bread crumbs, stirred in a little olive oil and salt and pepper, and spread it on the fish.


The green beans were also a cinch. The beans I found were a bit on the less-photogenic side, slightly shriveled and not the slim and lovely ones I love to eat, blanched, in late summer. Cook's Illustrated a couple of years back had talked about roasting as an option for this caliber of bean, and it is genius. Just snap off stem ends and spread on a foil-lined pan (for both the fish and the beans I used the bottom of a broiler pan, since they are less likely than my cookie sheet to warp in the oven), drizzle with a little olive oil and sprinkle with a little salt and pepper, and toss to coat.


Both the fish and the beans were set to cook at 450, so I was able to do them together, putting the fish in when the beans were ready for a stir after 10 minutes. The beans needed another 10 minutes to get spotty brown, and the fish a few minutes longer than that to get firm and just flaky. Delicious. I thought as I was putting it on the table that the fish could use some kind of sauce, so pulled out a jar of homemade cranberry jelly (from local cranberries, of course).

The salad is one I've been wanting to fix for book group for several years, since Grandpa Artsy-Fartsy fixed it on a visit. Perfect for citrus season. I made it pretty much straight, except with fewer raisins, I used blood oranges instead of navels, and I added the segments from about a half-dozen blood oranges (this last addition seemed like kind of a "duh" to me--how could you make a salad with an orange-juice-based dressing and not put any actual oranges in it?).

The dressing:


The segmented oranges (you slice off the peels with a serrated knife, then carefully cut alongside the membranes to release the good stuff):


The last bit (not a great photo, and in any case it tastes better than it looks):


The tart appeared in the paper last month. Nuts, caramel, chocolate, what else do you need? The only change I made was to use chocolate graham crackers instead of chocolate wafers for the crust. I think the wafers would have worked better.

The mixed-together crust:


Pressing the crust mix into the tart pan. I think I read the tip to use a stainless measuring cup in Cook's Illustrated. It really does an amazing job of preventing that blobby thick crust corner you can get if you use your fingers to press it into the pan.


The sugar and water, ready to make into caramel. The recipe says to stir it until the sugar is dissolved, but doesn't say to then stop stirring. But you should, because otherwise . . .


this happens. It ended up okay in the long run, but it would have been better had I not continued to stir.


The cream to stir into the melted sugar:
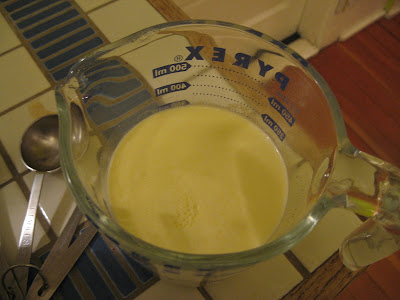

The egg and vanilla to fold into the cool-ish caramel:


The baked almond caramel in the chocolate tart shell:


Now, the recipe calls for heating cream on the stovetop and adding it to chopped chocolate to make the ganache. I always make my ganache in the microwave, with the cream and chocolate in the same bowl. Start out with a minute on high, then stir well, and zap in additional 30-second increments, stirring well in between (I think it did maybe two extra 30-second periods). It will start out looking like this:


Proceed to this:


And finally end up like this, smooth and glossy:


Here's what the cooked tart looked like. I thought it was pretty good, and the other members of the group RAVED. I thought the crust could have been better (I'll use the wafers next time), and the nuts didn't retain their roasted crunch. I don't know if that was because of how I stored it, or just a quirk of the recipe.


Now, I had originally planned to make homemade vanilla ice cream (I finally got around to making the custard today, with the Wizard's help), which would have been corn-free, but the Tillamook did unfortunately feature HFCS among its ingredients. There were also corn products in the graham crackers I used for the tart crust, and possibly in the bread crumbs I put on the fish (they weren't made from home-made bread). I guess technically the eggs probably also came from corn, but you can't really count that because chickens (unlike cows) are made to eat corn.

Thursday, January 15, 2009

Mixed Bag

I should have made it on New Year's Day, of course, but I got around to making Hoppin' JaneAnne, and this time I took pictures! It was only a mixed bag because Newton didn't like the squash, the Wizard didn't like the black-eyed peas, and Cindy Lou was pretty dubious about the whole thing. I thought it was delicious.

The black-eyed peas, a little overcooked because I forgot to turn the crock pot to low before going shoe shopping.


The bacon.


The butternut squash, peeled and cubed.


The onion, chopped in the Cuisinart.


Sautéeing the bacon.


Sautéeing the onions and celery in a little bacon grease.


Carrot, julienned with the mandoline.


Baby spinach, stemmed and roughly chopped.


Spinach sautéed with the wilted and browned onion and celery.


Toasting the rice in a little bacon grease.


Simmering the rice, carrot and squash covered in chicken broth.


The finished product, after folding in the bacon, sautéed veggies and black-eyed peas.