Friday, December 25, 2009

Crafty Christmas

I took a page from Design Mom Gabrielle Blair's book and decided to have my kids make presents for each other this year. Cindy Lou, being only two, was exempt (next year!), but each boy made (or rather, helped make) a present for the other and one for their sister. I loved how they turned out.

The Wizard helped me make a no-sew tutu for Cindy Lou, following the instructions here. I think it needs a bit of a trim, so it's not bigger than the wee girl herself, and so you can see the accent pieces of sparkly dark purple tulle a little better. Next time I do it I'll cut shorter pieces to start out with, and also use a higher contrast between the two non-highlight colors of tulle (bet you didn't guess there were two shades of lavender here, did you?)


Newton made a stenciled t-shirt for the Wizard, using the method I describe here. I suppose if I'd known beforehand what design we would be using, I might have selected a different color of shirt and/or paint. I guess next year we'll plan these things a little further ahead of time.


I was at a bit of a loss as to what the Wizard could make for Newton, and in the absence of a better idea picked up a letter and acrylic paint in Newton's favorite color. Impossible to screw up, and a nice addition to Newton's bedroom decor.


Newton helped me make a bunch of ribbon rosettes for Cindy Lou, mostly attached to barrettes. I followed Design Mom's lead, and think they turned out fabulous. I didn't have a glue gun handy, so I hand-stitched mine, both to keep the flower shape and to attach them to the barrettes. After an earlier attempt with a felt-covered barrette, I had my best luck with Scunci no-slip snap clips that have a plastic gripper around the bottom part of the barrette, and attaching the barrette directly to the back of the flower without any intervening fabric. The extra-large gold rosette (6" diam) we didn't put on a barrette, but left to be pinned on a waistband. One thing Gabrielle didn't note in her post on the rosettes, though it's evident in her pictures, was that she achieved some of her fuller-looking flowers by using 2 one-yard pieces of coordinating ribbon, gathered and then wound together. That is also the case with Cindy Lou's iridescent blue-green rosette at center right (and with the extra-large gold rosette).


Monday, December 7, 2009

Apple Bacon Cheddar Scones

Back in October, Burgerville's seasonal menu items all involved local apples. My far-and-away favorite of these was the Apple Bacon Cheddar Scone. I hope they'll bring them back next year, but in the mean time, I thought I'd try my own. Saturday was my first stab. I made my favorite scone recipe (adapted from Sheila Lukins' All Around the World Cookbook), adding sautéed bacon, caramelized diced apple, and grated cheddar cheese at the end. Next time I'll make it with a slightly smaller proportion of bacon and apples, and cook the apples a little less--they were caramelized enough to be chewy.
Apple Bacon Cheddar Scones
4 oz apple-wood-smoked bacon, sliced thinly, slices halved lengthwise and cut crosswise into 1/4" pieces
1 medium baking apple, peeled, cored, and cut into 1/4" wide wedges (I used a Pink Lady; Braeburn was my runner-up, and Granny Smith would work in a pinch)
1/4 C sugar
2 C all-purpose flour
1 T baking powder
3 T sugar
1/2 t salt
1/2 C unsalted butter, chilled and cut into 1/2-inch cubes
1 large egg, lightly beaten in liquid measuring cup
milk added to beaten egg to reach just above 1/2-cup line
4 oz. grated cheddar cheese (I used medium because I had it; I think sharper would be even better!)

Mixed diced apple with 1/4 C sugar (adjusting as necessary depending on tartness of apple). Sauté bacon over medium-low heat until most fat is rendered and it is crisp but not overly browned. Scoop bacon pieces onto a paper-towel-lined plate, and pour bacon grease in pan into a heat-proof container, leaving a small skim of melted fat in the pan. Add sugared apples and cook over medium-low heat until apples have softened, puffed, and started to brown. Scrape apples into bowl and toss with bacon pieces.

Preheat oven to 450 degrees. Put dry ingredients in bowl of food processor and pulse a couple of times to blend. Scatter butter pieces over flour mixture and pulse until mixture is slightly yellow and no pieces of butter larger than pea-sized remain. Pour 1/2 C of egg-milk mixture over other ingredients (leaving a couple of tablespoons liquid in measuring cup) and pulse until dough is starting to form curds but has not fully come together. Dump contents of food processor into a large bowl, add reserved apple and bacon and grated cheddar (reserving a little cheddar to sprinkle on top of scones), and mix gently with your hands, just until the extras are mostly evenly incorporated and cohesive dough has formed. Do not overwork. Divide dough into equal halves and form each half into a round, flattened disk about 3/4" thick. Use a pastry scraper to cut each round of dough into six wedges. Transfer to parchment-lined baking sheet (prepared scones can be chilled and held at this point as long as overnight), brush with reserved egg-milk mixture, and sprinkle with reserved cheddar. Bake about 15 minutes, then cool a little before serving.

Sunday, December 6, 2009

Classic Stuffed Turkey

We had a small, quiet Thanksgiving dinner, with just our family and J&J's. It was my turn to host, so I was in charge of turkey, stuffing, gravy, potatoes and one dessert, with J bringing sides, rolls and another dessert. I love stuffing, so I made two whole batches, not realizing that J&J's kids wouldn't eat any (!). I was thinking about the copious amount usually consumed by my brother Rib. I love having at least part of the stuffing cooked inside the bird, so I wanted a recipe for a stuffed turkey that would still turn out moist and delicious, and decided to try the latest turkey guidance from Cook's Illustrated.


Table setup with kissing corn (kids' table visible through doorway at center-right).


Table setup with pressed-glass turkey candle holders and linens and silver from my grandmother.

Wild Rice, Apple and Dried-Cranberry Stuffing from Gourmet (made by me)
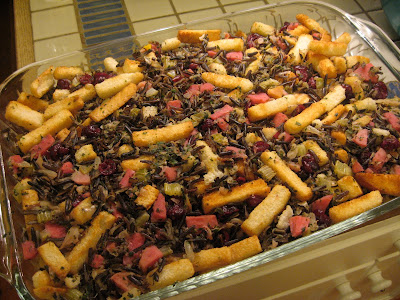

This stuffing was very good--it's pretty much just a basic bread stuffing with sautéed celery and onion and fresh parsley, sage & thyme, then some cooked wild rice, diced apple and dried cranberries stirred in. I would recommend either cooking this in the bird or keeping it covered the whole time it is in the oven--the wild rice on the edges got a bit crunchy/chewy.

Rolls rising (made by J from my great-grandmother's recipe).


Swiss Chard and Sweet Potato Gratin from Smitten Kitchen (made by J). This was delicious but very rich. Half a recipe would have been plenty for our small two-family group (again, the kids didn't eat much of it).


Old-Fashioned Stuffed Turkey from Cook's Illustrated's November-December 2009 issue.


This recipe calls for a 12-15 lb turkey, and mine was near the upper limit of that range (I did want some leftovers). A sidebar in the magazine lists the "secrets" to a great old-fashioned stuffed turkey:

1. Dry brine (rubbing turkey with salt under the skin and in the cavity 24-48 hours ahead of cooking)
2. Stab the fat deposits with a skewer to aid the rendering of fat
3. Dry rub with baking powder and salt just before roasting to encourage browning (I did not do this step, as in an earlier recipe trial of a roast chicken recommending this technique, it imparted a slight chemical taste)
4. Bard the turkey by draping strips of salt pork on its back while roasting
5. Combine stuffing cooked inside and outside the turkey (doesn't everyone do this anyway?)
6. High-heat finish for the last 45 minutes to crisp the skin.

Now, there were a couple of other small ways (in addition to number 3 above) in which I deviated from the recipe. Nevertheless, the turkey was moist and flavorful, giving off lots of fat and basically no juices during its roasting time (I poured off the grease and scraped up the brown bits to dissolve as much as I could into the gravy, straining to get out the undissolved bits; my brother pronounced it the "best gravy ever"). Here's how I did it:
Old-Fashioned Stuffed Turkey
adapted from Cook's Illustrated Nov-Dec 2009
Serves 10-12

1 12-15 lb turkey
3 T kosher salt
12 oz salt pork, cut into 1/4"-thick slices and rinsed

onion, celery, carrot and a few sprigs fresh thyme for gravy neck stock, chopped roughly

Your favorite stuffing recipe (besides the wild rice one linked above, I made a traditional stuffing with sautéed onions and celery and fresh parsley, sage and thyme. I did not make homemade bread for the stuffing this year, and missed it.)

Now, two days before Thanksgiving, having already put the turkey in the fridge to thaw several days before, you go to pull out the giblet/neck packet and salt the turkey according to the recipe. After having removed it from its wrapping, you discover that the bird is still frozen solid in the middle and completely unwilling to birth its packet. You panic and put the turkey on a rack over a broiler-pan bottom in the fridge, hoping that the direct contact with the fridge air will thaw it sufficiently by the next day.

One day before Thanksgiving, the giblet/neck packet is just barely able to be pried out of the cavity. You heat a little oil in a saucepan and brown the snot out of the neck, then sauté the chopped vegetables in the same pan, scraping up browned bits. Add the neck back in, add water to cover, and simmer for a few hours. Return to still very, very cold turkey, and rub 3 T kosher salt in cavity and under skin of breasts and legs, trying mightily not to tear it where it's become slightly dried-out and fragile from its uncovered overnight fridge stay. Cover it with plastic wrap, put it back in the fridge, and hope for the best.

Thanksgiving morning, get the turkey out of the fridge, remove plastic wrap, and hope it comes to something resembling room temperature by roasting time. Use a skewer to poke lots of little holes (1" apart) in all the thick, fatty parts of the skin on the breasts, thighs, legs and back. Prepare stuffing, then line cavities with cheesecloth and put in as much stuffing as will reasonably fit, leaving the rest in a bowl in the refrigerator. Preheat oven to 325 degrees. Place turkey breast-side down on a rack in a roasting pan and drape back with slices of salt pork.

Roast breast-side down until thickest part of breast measures 130 degrees, 2-2.5 hours. Remove from oven, close door, and increase temperature to 450 degrees. Transfer turkey in rack to another pan, remove and discard salt pork, remove stuffing bag, and turn turkey breast-side up. Empty stuffing back into reserved stuffing in bowl and mix together, then put in large casserole dish. Pour drippings from pan into strainer over fat separator, scraping pan with a silicone spatula.

When oven is up to temperature, return turkey in rack to roasting pan and roast until skin is brown and crisp, thickest part of breast is 160 degrees, and thickest part of thigh is 175 degrees, about 45 minutes. Transfer turkey to carving board and let rest 30 minutes.

Reduce oven temperature to 400 and bake stuffing until it reaches 165 degrees in the center. Make gravy from defatted drippings, neck stock, and a well-mixed slurry of flour and water, plus some of the potato cooking water if desired, seasoning to taste (probably won't need much salt!).

This was a fabulous turkey, in spite of the stressful moments that occurred in its preparation. That overnight uncovered fridge stay that dried out the skin some made it roast up perfectly, cracklingly crisp--my brother said it was like pork rinds only better--but left the flesh moist and delicious. This is a great, easy, non-chemical-y way to get the skin really, really crisp. It did make it quite a bit harder to rub the salt under the skin, but if I'd been able to do the salting before the drying of the skin, maybe that would solve that problem? Next time will tell.

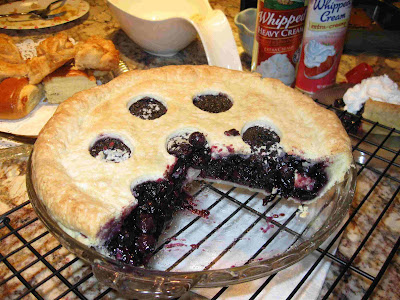
For dessert, J brought a perfectly-delicous Costco pumpkin pie and her homemade pecan dacquoise pie. and I made Banana Chocolate Bread Pudding, using leftover challah from previously having made Pumpkin Pie Bread Pudding with Bourbon Toffee Sauce for a friend. The challah wasn't left over, per se, because I did use a whole loaf for the first bread pudding, but it was left over because, after searching high and low for already-baked challah, I made my own. I guess in the middle of Thanksgiving week, all the bakeries are turned over to dinner rolls, and there wasn't any challah. I suppose I could have substituted, but I wanted to follow the recipe as closely as I could, so there I was, two nights before Thanksgiving, madly making challah late in the evening and about killing my KitchenAid in the process. Anyway, both of them turned out delicious, though I should definitely have used less than the whole loaf for the banana pudding.

And after all that effort over the bread, I couldn't muster up a couple tablespoons of bourbon for the toffee sauce, so I used Kahlua instead. Next time for the bourbon.
Saturday, October 31, 2009

Happy Halloween!


Growing up, Halloween was one of our favorite holidays. Not only did we get to go trick-or-treating, my parents would make donuts! Well, spudnuts, really, made with mashed potatoes in the dough. These are traditional yeast-raised, deep-fried goodies, with a simple powdered-sugar glaze. Tonight I made a double batch, 7 dozen plus a few using the smaller of my two cutters, and we ended the evening with just five left. Several bags were delivered to friends and neighbors, and adults chaperoning trick-or-treaters also got lucky.

I don't use a deep-fat fryer or a cast-iron dutch oven to fry my donuts. I use the same tool my parents used back in the 1970s: an electric frying pan. Mine is bigger than theirs was, which speeds the process some, but not too much--it's still crucial to let the oil come back up to temperature after every panful. This built-in refractory period means adding another kitchen worker doesn't speed stuff up much, if at all.
Spudnuts
adapted from a recipe submitted to the Salem Fourth Ward cookbook, Garden of Eatin', by Pat Youngberg

2 eggs, beaten slightly
1/2 C cooled mashed potatoes
1/2 C potato water
1 C scalded milk
1/2 C sugar
1/2 C light corn syrup
1/2 C unsalted butter, softened
2 t salt
3 T yeast, dissolved in 1/4 C warm water
6 C flour, plus more for kneading and rolling

Glaze:
1 lb powdered sugar
1/2 C boiling water

Mix ingredients to make a soft, sticky dough. Turn dough into a bowl, cover with plastic wrap, and let sit in a warm-ish spot (I use my oven with just the light on) for two hours (don't let it go too much longer--I couldn't get back to mine for nearly an extra hour, and the dough had overflowed the bowl onto the baking stone and floor of the oven!). Knead just a little, adding flour to make the dough less sticky and workable, then roll 1/2 inch thick. Cut with a donut cutter, and put cut donuts on cookie sheets lined with waxed paper, with just a little space between, saving and rerolling the holes and other dough scraps. Let rise until doubled, just about an hour (again, not longer--those last few donuts pictured above are misshapen because the longer they rise, the stickier they get, and the harder it is to get them off the waxed paper). A half-hour before the first ones will be ready to fry, start heating the oil in your electric frying pan, with the temperature set to halfway between 350 and 375 (this helps ensure that the temperature doesn't drop much below 350; at temperatures below 350, the donuts absorb oil and turn greasy and heavy). Measure powdered sugar in a flat-bottomed bowl, and put measuring cup with water in microwave ready to heat. Arrange cooling racks over waxed paper on table for glazed donuts.

When oil is hot and donuts have risen, start frying them. Gently place dough into oil, taking care not to overfill pan (in my extra-large frying pan, I try not to do more than about 10 at a time). Turn (I use a dinner fork) when bottom side is deep golden to fry on second side. In the mean time, heat water in microwave and whisk into powdered sugar to make a smooth glaze. It should be about the consistency of olive oil. As donuts finish cooking, lift them out of pan, let some oil drip off, then place on brown paper bags or paper towels to soak up grease. When they're all out of the oil, drop one at a time into the bowl of glaze, swirling around and then flipping (I use a bamboo skewer) to get a nice coating. Lift donut with skewer in the center hole and let some glaze drip back into bowl, then place on cooling rack. Check to make sure oil has come back up to temperature while you were glazing, and then repeat until all donuts are fried and glazed.

When you are all done and the oil is cooled down to just warm, strain it (using a coffee filter or a couple of paper towels) back into its original jug and put it in the fridge. It can be used a few more times if you have another frying project within three months (latkes, anyone?), otherwise take it to be recycled into biodiesel (here in Portland you can take it to the Metro transfer station, if you don't have a regular relationship with a biodiesel processor).

Note: Do not eat the dough while cutting out the donuts. Trust me when I say you will be sorry.

Monday, October 26, 2009

Hail, Gourmet!

I had printed off a couple of recipes from Gourmet, based, on recommendations of friends and other food bloggers, and have finally got around to making them. I hope they don't disappear from the web any time soon, but if the links stop working, let me know and I'll type them in.

First up, Sweet Potato Gnocchi with Fried Sage & Chestnuts. Based on my experience with adding sweet potatoes to traditionally all potato recipes (as in Orange Mashed Potatoes, Orange Potato Gratin, and Orange Latkes), I had an inkling it would be good. I made it almost exactly as written, except that I didn't roll the dough into tiny balls before rolling down the back of a fork (I didn't care if they weren't that uniform). Plus I didn't shave the chestnuts, because my chestnuts (which I had roasted, peeled, and frozen) didn't shave, but crumbled. Oh well! Anyway, this recipe was fantastically delicious, and snarfed up by all eaters, especially my mother-in-law.


Then I made not just one, but twoPear Butterscotch Pies. For my all-butter pastry, I used my adapted version of the Cook's Illustrated foolproof vodka pie crust. It was really, really good, and not nearly as sweet as the name might make you think. The brown sugar and pear juices combined to bake into a brown, almost custardy, goo. A la mode, this pie was darn-near divine.

Sunday, October 18, 2009

Creepy Treats, anyone?


Witches' Fingers

1 C butter, softened
1 C powdered sugar
1 egg
1 t almond extract
1 t vanilla extract
green food coloring
2 3/4 C flour
1 t baking powder
1/2 t salt
3/4 C whole blanched almonds
1 tube red decorating gel

Beat together butter and sugar, then beat in egg, extracts and food coloring. Stir in dry ingredients, then chill.

Preheat oven to 325 degrees. Roll one-inch ball of dough into a finger shape--thin with a thick knuckle. Press almond into one end for fingernail. Cut wrinkle slashes into knuckle with sharp paring knife.

Bake on parchment-lined cookie sheets 20-30 minutes (longer time for insulated sheets), until just starting to color. Let cool five minutes, then lift almond and squeeze gel underneath. Let cool completely (and gel set) before moving into a tin for storage.

Sunday, September 20, 2009

Inspired by Africa

My book group most recently read Things Fall Apart by Chinua Achebe. When I think of African food, I recall a memorable meal cooked for my family when I was a girl by Kwame, a Ghanaian student at Willamette University. It was a spicy and savory stew with chicken, tomatoes, vegetables, and what seemed to me at the time a most improbable ingredient, peanut butter. My recipe book collection completely failed me, but I found this recipe. I replaced half the sweet potato with cubed butternut squash, used a small can of diced tomatoes (drained), and browned the chicken (boneless, skinless thighs) before the onion, but otherwise stuck pretty close to it. It was delicious.

We had Como bread from Grand Central Bakery, a green salad with dried cherries, toasted slivered almonds, and chèvre with balsamic vinaigrette, and then finished with Peach Cupcakes with Brown Sugar Cream Cheese Frosting. They were delicious. The one thing I would change would be the cornstarch in the frosting, which I found a little distracting.

Wednesday, September 16, 2009

The Last Gasp of Summer

We had beautiful summer weather last weekend, so I wanted to take advantage of our bounteous local harvest and have one last patio meal. Pulled pork, buttermilk coleslaw, sautéed zucchini and corn, roasted heirloom tomato tart (this time with chèvre!), and plum cake and Honey-Caramel Peach Pie à la mode for dessert. Corn, zucchini, tomatoes and peaches--can't get much more summer than that!

The tomato tart:


Buttermilk Coleslaw
adapted from Cook's Illustrated Jul/Aug 2002

I doubled the recipe, using a whole small head of lavender cabbage that weighed just under 2 lbs.

1 lb cabbage, shredded fine (quarter, core, then shred in food processor)
Salt
1 medium carrot, shredded (I used my julienne peeler)
1/2 C buttermilk (I was just shy and used a little plain whole-milk yogurt to make up the difference)
2 T mayonnaise
2 T sour cream
1 small shallot, minced (about 2 T)
2 T minced fresh parsley leaves
1/2 t cider vinegar
1/2 t sugar
1/4 t dijon mustard
1/8 t freshly ground black pepper

Toss shredded cabbage and 1 t salt, then put in a colander over a bowl. Let stand 1-4 hours until cabbage wilts (it never seemed all that wilty to me, and it didn't express any water). Rinse cabbage under cold running water, then press gently and pat dry with paper towels (don't wring). Put cabbage and carrot in a large bowl.

Stir remaining ingredients together in a small bowl, then pour over cabbage and toss to combine. Refrigerate until chilled, then serve.

Sautéed Zucchini & Corn
adapted from recipes in Cook's Illustrated and Cook's Country
makes a side dish for 8-10


a bunch of zucchini (like, 8 small--I used 2 large and 1 medium)
3 T unsalted butter
1 medium shallot, minced
4 ears sweet corn, kernels removed with a serrated knife
2-3 T chopped fresh basil
1 T olive oil
salt & pepper

Grate zucchini (I used the food processor). Toss with 1 t salt, and put in a colander over a bowl. Let sit for 30-45 minutes. It will give off a lot of water. Then squeeze out even more water by wrapping zucchini in a triple layer of paper towels and wringing (in two batches if necessary). Toss with olive oil and corn in a large bowl.

Heat butter over medium-high heat in a nonstick skillet. When foaming subsides, sauté shallot until just soft. Add zucchini and corn and sauté until tender. Top with basil and salt and pepper and serve.

The pie (my brother said it was the best crust he's had in his whole life!):

Monday, August 31, 2009

Blackberry Pie


So, I made the blueberry pie recipe with blackberries instead. The berries were pretty tart, so I increased the sugar to 1 C. I remembered the egg wash on the crust this time, and the lemon juice (I still left out the lemon zest, which I almost never care for).

YUM. I've never been a pie person (except for pumpkin), but this is almost enough to convert me. In any case, it's something I'll be adding to my seasonal rotation. And other times, too (since I froze enough blackberries for another two pies).

One note to emphasize in the original recipe: they weren't kidding about letting it cool down all the way before slicing it. When first cut while still warm, the filling was pretty loose and ran out into the pie plate. But left over the next day, it sliced neatly with no big oozing.

Sunday, August 23, 2009

Blueberry Pie with Vodka Crust


I'd heard a lot from friends about the fabulous vodka pie crust from Cook's Illustrated. Finally I had a chance to try it for myself! At the peak of blueberry season, a local blueberry farmer sells gallon-sized zipper-lock bags FULL of blueberries at the farmers' market for a good price. I had Mavis pick one up with the idea that I would (finally) try this recipe, even though I don't personally care for blueberries. We took it to a potluck with a can of whipped cream (easier than ice cream) and it was a HUGE hit. No leftovers.
Blueberry Pie with Foolproof Vodka Crust
adapted from Cook's Illustrated Jul/Aug 2008

Foolproof Pie Dough
2 1/2 C flour, plus more for work surface
1 t salt
2 T sugar
2 sticks cold unsalted butter, cut into 1/4-inch slices (Cook's calls for 3/4 C butter and 1/4 C shortening, but I don't DO shortening, ever)
1/4 C cold vodka (absolutely necessary to this recipe; do not omit; if you can't stand to use it, switch to a different recipe)
1/4 C cold water

Process 1 1/2 C flour, salt and sugar in food processor until combined. Add butter (and shortening if you're using it) and process until homogenous dough just starts to collect in uneven clumps, about 15 seconds. Scrape bowl with spatula and redistribute dough around work bowl. Add remaining 1 C flour and process 4-6 quick pulses to break up clumps. Empty into medium bowl.

Sprinkle vodka and water over mixture. Use rubber spatula to fold and press mixture into itself until dough is slightly tacky and sticks together. Divide into two evenly-sized balls and flatten into 4-inch disks. Wrap in plastic wrap and refrigerate 45 minutes to 48 hours.

Remove 1 disk of dough from refrigerator and roll out on generously floured work surface to 12-inch circle, about 1/8 inch thick. Roll dough loosely around rolling pin and transfer to pie plate, easing dough down into bottom of pie plate. Refrigerate while preparing filling.

Blueberry Filling
6 C fresh blueberries
1 Granny Smith apple, peeled and grated on large holes
2 t grated zest and 2 t juice from one lemon (I omitted this and it didn't kill it)
3/4 C sugar
2 T instant tapioca, ground in spice grinder or mini food processor
2 T unsalted butter, cut into 1/4-inch pieces

egg wash (egg lightly beaten with 1 t water) (I omitted this too, just because I forgot, and it didn't kill it)

Adjust oven rack to lowest position (oops, forgot that too), put rimmed baking sheet on rack, and preheat oven to 400. Put 3 C berries in medium saucepan over medium heat. Mash with potato masher to start releasing juices. Cook, stirring and mashing occasionally, until mixture is thickened and reduced to 1 1/2 C. Let cool slightly.

Put grated apple in clean kitchen towel and wring dry. Put in large bowl. Add cooked berries, uncooked berries, lemon zest and juice, sugar, tapioca, and salt. Toss to combine, then put in dough-lined pie plate and scatter butter pieces over filling.

Roll out second disk of dough on floured work surface to 11-inch circle. Cut 7 small circles out of dough with 1 1/4-inch cutter. Roll dough loosely around rolling pin and unroll over pie. Roll top layer of dough over bottom layer of dough, crimp and flute. Brush with egg wash. Put on heated baking sheet and bake for 30 minutes. Reduce oven to 350 and bake until juices bubble and crust is golden, 30-40 minutes more. Cool on wire rack to room temperature, cut into wedges and serve.

Next up--I'll try this same recipe with blackberries. Don't know why it shouldn't work.

Saturday, August 22, 2009

Homemade Gyros

Another winner from Cook's Illustrated. Not a huge hit with any of the kids, but Mavis and I thought it was delicious. We bought ground,locally-raised lamb at the farmers' market, plus local lettuce and cherry tomatoes.
Homemade Gyros
adapted from Cook's Illustrated Jul/Aug 2007

4 large pitas (I made my own)
1/2 medium onion, roughly chopped
4 t fresh lemon juice
1/2 t salt
1/4 t freshly ground black pepper
1 T minced fresh oregano leaves (mine dried up in the heat, so I used 1 t dried--from a jar, not from the backyard)
2 med cloves garlic, pressed through garlic press (about 2 t)
1 lb ground lamb
2 t vegetable oil
Tzatziki sauce (below)
1 large tomato, sliced thin, or 1/2 pt cherry tomatoes, halved
2 C shredded iceberg or romaine lettuce
2 oz feta cheese, crumbled (about 1/2 C)

Preheat oven to 350. Cut top quarter off each pita bread, and tear into one-inch pieces (about 3/4 C total). Stack pitas and wrap tightly in foil. Process onion, lemon juice, salt, pepper, oregano, garlic and pita pieces in food processor until they form a smooth paste. Transfer mixture to a large bowl, and then mix in lamb with hands until thoroughly combined. Divide meat mixture into 12 equal pieces and roll into balls, then flatten to make 1/2-inch-thick mini-patties (about 2 1/2 inches in diameter).

Put foil-wrapped pitas directly on oven rack and heat for 10 minutes. Meanwhile, heat oil in 12-inch nonstick skillet over medium-high heat until just smoking. Add patties and cook until well-browned with a crust, 3-4 minutes.


Flip patties, reduce heat to medium, and cook another five minutes or so, until browned and crusty on the second side. Transfer to a paper-towel-lined plate.


Using soup spoon, spread 1/4 C Tzatziki Sauce inside each pita. Divide patties among pitas, then top with tomato, lettuce and feta. Serve immediately.


Tzatziki Sauce


1 C plain whole-milk yogurt (Brown Cow is best!)
1/2 medium cucumber, peeled, seeded and diced fine (about 1/2 C)
3/8 t salt
1 T fresh lemon juice
1 med garlic clove, pressed through garlic press (about 1/2 t)
1 T freshly chopped mint or dill (I used mint)

Line fine-mesh strainer set over deep bowl with 3 paper coffee filters or 3 layers of paper towel. Spoon yogurt into lined strainer, cover, and refrigerate for 30 minutes.

Meanwhile, combine cucumber, 1/8 t salt, and lemon juice in colander set over bowl and let stand 30 minutes.

Discard strained liquid from yogurt and cucumber. Combine thickened yogurt, drained cucumber, remaining 1/4 t salt, garlic and mint in clean bowl.

Thursday, August 20, 2009

Summer Picnic Fare

Love me a good picnic. We recently attended one with just the right number of people (6 families, plus a few extra folks), just the right weather (not too hot, not too chilly), and lots of good food. I took three things to share: Picnic Chicken, Three-Bean Salad, and The Thin (crispy buttery chocolate chip cookies--perfect if, like me, that's the kind of chocolate chip cookie you like, although even the folks who claim to love gooey chewy cookies didn't exactly struggle to get them down). No pictures because we were in a hurry to get out the door, as usual.
Picnic Chicken
adapted from Cook's Illustrated Jul/Aug 2006

5 lbs or so chicken pieces (I cut up two 3.5-pounders, saving the wings and backs for stock), breasts cut into 2-3 pieces, trimmed of excess fat and skin (leave some skin on each piece, just cut off the hanging fatty flaps), short slits cut into remaining skin but not into the flesh

2 T kosher salt
3 T brown sugar
2 T chili powder
2 T sweet paprika
2 t ground black pepper
1/4-1/2 t cayenne (less if you're serving kids)

Mix dry ingredients, then coat chicken pieces, under skin as well where possible without completely dislodging skin. Put chicken on wire rack over rimmed baking sheet, tent with foil, and refrigerate 6-24 hours. It must be at least six hours, or the moisture will not have had a chance to migrate back into the meat (I can explain at greater length if you're puzzled, but trust me, this is a crucial step to the recipe and cannot be shortcutted).

When ready to cook, heat oven to 425. Roast chicken until thickest part of smallest piece reaches 140 on an instant-read thermometer, about 14-20 minutes. Increase oven temperature to 500 and roast until thickest parts of breast pieces reach 160, 5-8 minutes, removing pieces as they finish and transferring to clean wire rack. Roast dark meat until thickest parts register 170-175, 5 minutes or so longer. Transfer to rack and let cool completely before refrigerating or serving.

The next time I make this recipe, I will probably eliminate or nearly so the cayenne pepper (too spicy for the kids), and I will either try it on the grill or use a broiler pan. Cleaning the baked-on chicken juices from my cookie-cooling rack was a major chore (lovingly undertaken by my husband). And for sure I will line whatever I cook it on with foil--my cookie sheet will probably never recover.
Three-Bean Salad
adapated from Cook's Illustrated Jul/Aug 1999

1 C red wine vinegar
3/4 C sugar
1/2 C canola oil
2 medium garlic cloves, minced or pressed through garlic press
1 t salt
freshly-ground black pepper
8 oz fresh green beans, stemmed and cut into one-inch pieces
8 oz fresh yellow wax beans, stemmed and cut into one-inch pieces
1 15-oz can red kidney beans, rinsed and drained
1/2 medium red onion, chopped fine
1/4 C minced fresh parsley leaves

Heat vinegar, sugar, oil, garlic, salt and pepper in a small saucepan over medium heat, stirring occasionally, until sugar dissolves. Transfer to a large nonreactive bowl and cool to room temperature.

Blanch green and yellow beans in salted boiling water for 3-5 minutes, depending on thickness of beans. Shock in ice water to stop cooking, then drain well.

Add all beans, onion and parsley to dressing and toss well to coat. Cover and refrigerate overnight to blend flavors, then let come to room temperature at least 30 minutes before serving.

Pasta with Summer Squash Redux

I made this recipe again, and I remembered to take a picture. Just barely (this is the last of the leftovers).


Too bad the kids are on an anti-zucchini kick.

Sunday, August 9, 2009

Rice Salad

Tonight we had some of the sockeye salmon my dad caught in Alaska on his birthday fishing trip, fresh sweet corn on the cob, and a rice salad with cauliflower, currants, almonds and peach. Amazing what happens when I decide what I want to make before sending Mavis to the farmers' market.


Curried Rice Salad
adapted from Cook's Illustrated Jul/Aug 2000

1 C basmati rice
1 1/2 t salt

Bring a few quarts water to a boil in a large saucepan. Heat a large nonstick skillet over medium heat until hot, then toast rice in dry skillet for five minutes or so. Carefully add rice and salt to boiling water and cook, uncovered, 10-12 minutes until rice is tender but not soft. Drain rice in fine-mesh strainer or colander, then spread in a foil-lined baking sheet to cool while preparing other ingredients.

2 T canola oil
2 C small cauliflower florets (about half a small to medium head)
1 T curry powder
1 t salt
1/4 C currants
1/2 C chopped roasted almonds (recipe originally called for cashews)
1 medium peach, peeled and diced (recipe originally called for mango)
3 T minced chives (I had considerably less than this because mine dried up in the heat)
1/4 t ground black pepper

Heat oil in skillet over high heat until just shimmering. Add cauliflower, curry powder, and 1/2 t salt and cook, stirring, for about a minute, until curry coats cauliflower. Add currants and 1/4 C water, stir, cover, reduce heat slightly, and cook for a few minutes, until water evaporates and cauliflower is tender. Transfer cauliflower to a large bowl, stir in rice and other ingredients, including remaining 1/2 t salt. Let stand 20 minutes to blend flavors before serving.

Thursday, August 6, 2009

Chicken & Potatoes a New Way

As you may have heard, last week in Portland was too hot to do much of anything, let alone cook. But I had all this food Mavis had bought, and I needed to cook it. Plus, The Laundry Queen and her family were coming to visit, and I didn't feel like serving or eating anything we might have gotten for takeout. So, roast chicken and scalloped potatoes it was. Not really summery, except that we cooked it on the grill.

There's nothing particularly difficult about roasting a chicken on the grill. Prepare it the way you would to roast in the oven. For me, that usually means just a little salt and pepper, and maybe a little softened butter. This time I happened to have some leftover all-purpose grill rub (I'm not even sure what was in it any more), so I rubbed it all over the skin and under the skin on the breast.

Start a chimney full of briquettes, and when they're ready spread them evenly on both sides of the grill, leaving a space wide enough for the chicken in between. To make absolutely sure they'll last long enough for the chicken, spread a few unlit coals over the top. Heat, scrape and oil the grate, then place the chicken breast side down and close the lid, with top vents half open. For a chicken around four pounds (the size I usually do, which usually makes two dinners for us), leave it alone for a half-hour. Flip it over on its back and cook, lid closed, at least another half-hour before taking its temperature. When it's 165 in the breast and thigh, pull it off and tent with foil to rest.

Now for the potatoes. They were inspired by a recipe The Laundry Queen saw on the Pioneer Woman blog.
Grill-Scalloped Potatoes

2.5 lbs russet potatoes, peeled and cut into one-inch cubes
1-2 garnet sweet potatoes, peeled and cut into one-inch cubes
1 medium yellow onion, peeled and cut into wedges
1/2 t sweet Spanish paprika
1/2-3/4 C heavy cream
kosher salt and freshly ground white pepper to taste
several tablespoons butter

Toss all ingredients except for butter in a large bowl until thoroughly combined. Divide evenly between two or three large pieces of heavy-duty foil, put a blob of butter (2-3 T per pouch) on top, and bring sides up to make fairly-well-sealed-but-still-openable and fairly flat pouches. Put them directly over the coals on either side of the chicken when you flip the chicken over. Roast until tender and starting to brown, stirring once or twice during cooking.

Saturday, July 25, 2009

DIVINE Chocolate Cake

We celebrated the Wizard's birthday tonight in the back yard. Once again we had pulled pork sandwiches* with cole slaw, corn on the cob, watermelon, a few chips, and some delicious baked beans brought by friends (need to get that recipe!).

Dessert, though, oooooohhhhhhh. I made a recipe that's been in my queue for quite a while: Chocolate-Buttermilk Layer Cake. It appeared in Portland Monthly in February of 2008. Instead of both filling and frosting it with ganache, I cut the cake into four layers and used ganache for all three layers of filling, and frosted the top and sides with Fluffy Cream Cheese Frosting. We also had The Cupcakes, also with cream cheese frosting, because we had enough guests that just one dessert I thought would not be sufficient. As it turned out, just the cake would have been enough if I had cut it in the small pieces its richness warranted. The size pictured is too big even for a chocoholic like me, and even with vanilla ice cream to cut the richness.


Chocolate-Buttermilk Layer Cake
adapated from Portland Monthly Mag

3 C unbleached all-purpose flour
2 1/2 C sugar
1 1/2 T baking soda
1/2 t salt
1 C cocoa powder, sifted
1 1/3 C canola oil
1 1/2 C buttermilk
3 large eggs
1 1/2 C freshly-brewed, extra-strong hot coffee (I made instant coffee at about 150% the strength recommended on the jar)
1 t vanilla
16 oz bittersweet chocolate (24 oz if using for one layer of filling and top and sides of cake)
1 C heavy cream (1 1/2 C if using for one layer of filling and top and sides of cake)

1. Preheat oven to 350 degrees. Coat two 9-inch round cake pans with nonstick cooking spray and line the bottoms with parchment paper.

2. Put dry ingredients in bowl of stand mixer, and mix with paddle attachment at low speed to combine. Keep mixer on low speed and add oil, buttermilk, and eggs one at a time. Add hot coffee in a thin stream, pouring down the side of the bowl. Add vanilla, scrape sides of bowl with rubber spatula, and mix just until smooth. Divide between pans and bake until a toothpick comes out of the center with moist crumbs, 40-45 minutes (original recipe says 30-35, but the cake wasn't close to done at that point). Let cool in pans 10-15 minutes, then transfer to wire rack to cool completely, peeling parchment off bottoms of layers but putting cakes right side up on rack.

3. Put cream and chocolate (chopped if necessary) into a microwave-safe bowl and microwave on high for one minute. Stir well, then microwave for an additional 30 seconds. Stir until all the chocolate is melted and the mixture is glossy and dark, zapping another 15-30 seconds if absolutely necessary. Let cool to room temperature, stirring occasionally.

4. Trim cooled cakes just a little, so they're not too domed, then carefully cut in half horizontally with a serrated bread knife. Before separating the layers, cut a small notch in the side to line up when reassembling the layers after filling, since almost no one cuts that perfectly. Put one bottom layer on a cake plate, placing strips of waxed paper under the edges. Top with one-third of the ganache, and spread to within one half-inch of the edge. Place matching top layer, lining up notch, and top with another third of the ganache. Repeat with second split layer of the cake. Put filled layers of cake in fridge for 15-30 minutes to set ganache a little before icing.

5. Apply crumb coat of cream cheese frosting to sides and top of cake. Refrigerate for 15 minutes more, then spread remaining frosting on top and sides of cake. Refrigerate a couple of hours before serving.

*You don't need a recipe for the pulled pork, right? I bought a boneless Boston butt (big pork shoulder roast) from our favorite farmers' market pork purveyor, and coated it with a little oil and salt and pepper. I made a big fire in one side of the grill (charcoal, of course) and seared the snot out of it last night, then moved it to the cool side for 60-90 minutes. Around midnight, I put it in a roasting pan, covered it tightly with foil, and moved it into a 250-degree oven overnight. At 9 this morning I wrapped it tightly in foil and put it into a cooler to rest and cool slowly until this afternoon. It was just cool enough to handle, so I separated out the fat and the crispy parts with my fingers, then shredded the meat with two forks. I mixed in a little sauce, and served more on the side. This time the sauce was bottled (Cook's Illustrated's top choice, Bulls-Eye, now made without HFCS!), but last year I made a ketchup-based sauce from a Cook's Illustrated recipe. The coleslaw was made using the recipe on the side of the bagged coleslaw package. Maybe for a future year (we'll have this for the Wizard's birthday every year as long as he goes along) I'll make a fancier scratch coleslaw, and bring back that scratch sauce.

Monday, July 20, 2009

Northwest-Indian Fusion

Or at least my attempt. For our book group meeting to discuss White Tiger by Aravind Adiga, I chose an Indian-inflected menu. Oh, it was nothing like the women in Jhumpa Lahiri's The Namesake, slaving all morning to put on a lunch spread of many dishes. I made a Salmon Biryani, substituting skinless Columbia River Chinook filets for the chicken in the Chicken Biryani recipe, skipping the browning step. I'm pretty sure they don't have salmon in India (somebody please correct me if I'm wrong), but if they did they would put it in a biryani like this. The raita (yogurt sauce as it's called in the recipe) was divine as always. I served it with Curried Cauliflower:
Ginger-Curry Cauliflower
adapted from Real Simple magazine

1 head cauliflower, broken into bite-sized florets
2 T olive oil
1 T unsalted butter
2 t grated fresh ginger root
2 t curry powder
1 t turmeric
1/2 t kosher salt (recipe originally calls for 1/4 t, but it wasn't enough)
1/4 C fresh bread crumbs
1/4 C chicken broth (optional; I've made it both with and without and it turned out fine either way)
1 T fresh parsley, minced (optional; if I'd remembered to save any of the mint and cilantro from the other menu items I'd have used that instead)

Steam cauliflower until fork tender. Heat oil and butter in a large skillet over medium heat. Add ginger, curry powder, turmeric, and salt and cook for 1 minute, stirring frequently. Add bread crumbs and cook another minute. Add cauliflower (and broth, if using) and cook until any liquid is absorbed and cauliflower is well-coated. Remove from heat and toss with parsley or other herbs, if using.

We had a palate-cleansing simple salad of baby greens, dried cherries and hazelnuts in balsamic vinaigrette, then finished with mixed berries (raspberries, boysenberries, marionberries and blueberries, purchased at the farmers' market that morning) over vanilla ice cream. Yum!

Sunday, June 14, 2009

More Rhubarb

Rhubarb season is still going strong, and will be for quite a while yet. If we weren't leaving on vacation this week, I'd probably make and can Rhubarb-Ginger Jam, and Rhubarb-Ginger Chutney. But alas, no such luck, although maybe with another sort of luck the rhubarb will still be good when we get back from our travels.

This week I had two rhubarb dessert plans involving rhubarb, so I went to the garden and pulled a few of the largest stalks.


First up, for a movie screening we attended Friday (of Nobody Knows: the Untold Story of Black Mormons) was a remake of Rhubarb-Ginger Tart, which I first invented a couple of summers ago. This time I baked it in eight smaller tart shells, doubling the original recipe, and I remembered to take pictures.

Here is the rhubarb macerating with the sugar, cornstarch, salt, and ginger:


And the baked tarts (which were a huge hit topped with vanilla ice cream):


I also decided to try rhubarb ice cream, based on the Fresh Strawberry Ice Cream I made, once again this year, for the end-of-season potluck. I made 2.5 batches of the Sweet Cream Base, then mixed in one recipe of the Stewed Rhubarb, and froze it in my big ice cream maker. It was none too rhubarb-y; next time I'll try it with a slightly bigger batch of Stewed Rhubarb--definitely not double, but maybe 1.5 times as much.

The rhubarb macerating before stewing:


The eggs, sugar and milk before heating to 180 degrees over medium heat:


The finished product:


The cake we ate it with (the Fluffy Yellow Cake I used in the Rhubarb Cream Cake, with the chocolate frosting that accompanied it in Cook's Illustrated):


Tuesday, June 2, 2009

Macaroons Again

I used the last of my leftover egg whites for another double batch of macaroons today, this time from whole roasted almonds. I haven't filled any with ganache yet, and they are already incredibly delicious. Roasty, chewy, really, really nutty. I've eaten about a dozen (they are only 1.5" across) already.

PS They were even better with the ganache!

Tuesday, May 26, 2009

Rhubarb Cream Cake Variation

Had a pleasant surprise at the farmers' market on Saturday: local Hood strawberries! Not as good as they'll be in a couple of weeks, but still almost-indescribably delicious. So I modified the two rhubarb cream cakes I made this weekend to include some. I still used the rhubarb-custard mixture for the top and bottom layers of filling, but changed to middle layer to a little of the cream plus sliced and sugared strawberries. We saved a few pretty strawberry halves for the top.


Here's a shot that shows how unstable the cake can be when cut. I stabilized the cake I made to give away on Saturday with a few bamboo skewers, which I'd highly recommend if you want to avoid severe layer slippage as seen here.

Saturday, May 23, 2009

Almond-Hazelnut Macaroons

I make macaroons a lot (basically whenever I have leftover egg whites), but I've never posted the 100% complete recipe here (I did sort of post it, but the details of making them came out in the comments, and at least one important detail was omitted).

I detest coconut, and so never really ate the macaroons most commonly available here in the US. In Russia, though, I bought a hazelnut macaroon on the street, and LOVED it. In the last few years fancy bakeries have started making them here in Portland. One popular place makes them in pastel colors with delicate flavors and buttercream filling. They're good, but fairly insubstantial. I like something with a bit more oomph: crunch, chew, and nut flavor. So, it didn't take much convincing for me to try the recipe for macaroons in The Dessert Bible. I've deviated from the original in ways that some might consider pretty major, most notably by using a) roasted and b) natural (not blanched) almonds. This is all by way of boosting the nut flavor; I'm afraid I wouldn't like traditional macaroons using raw blanched almonds nearly as much.

One reason I've made so many macaroons is that I had a huge amount of diced roasted almonds I'd purchased several years ago (I can feel the Laundry Queen cringing!) at a deep discount directly from the Blue Diamond growers' collective. I'd been storing them in my freezer (where you should always store all nuts, raw or roasted), but they really needed to get used up. After several recent batches (using up the egg whites generated as a side product of the Rhubarb Cream Cake), I finally ran out of diced roasted almonds while measuring out the nuts for today's batch! Fortunately I had several pounds of roasted hazelnuts on hand, so used almost half hazelnuts this time around. These macaroons are probably my favorite ever. Ever.
Chewy Nut Macaroons
adapted from The Dessert Bible

1 3/4 C nuts, preferably roasted, either with or without skins, with at least half of the nuts almonds
1 1/4 C granulated sugar
pinch salt
3 egg whites, at room temperature
1 t almond extract (or vanilla extract if using other kinds of nuts)

Ganache Filling:
3 oz bittersweet chocolate
2 T heavy cream

Process nuts with sugar and salt in food processor until finely ground. Add egg whites and flavor extract, and process until batter is smooth. Transfer to a pastry bag, and pipe 1.5-2.5" circles of dough onto parchment-lined cookie sheets. Let sit at room temperature for at least an hour and not longer than two. Preheat oven to 300 degrees. Bake macaroons, one sheet at a time, until firm, fragrant, and just starting to brown at edges, 30 minutes on insulated sheets. Let cool completely before peeling off parchment (otherwise you'll leave cookie on the paper).

To make ganache filling, put chocolate and cream in a microwave-safe bowl and microwave on high for 30 seconds. Stir thoroughly, and microwave in additional 30-second increments as needed, stirring well in between, until perfectly smooth. Sandwich cookies around a little ganache filling, and let it set before eating if you want to avoid chocolate oozing.


I regularly make these in a double batch, but I think trying to do more at once would severely risk quality (not to mention overworking your food processor!).

Sunday, May 17, 2009

Rhubarb Cream Cake

No, I haven't been posting much lately, but this one is worth the wait. I first made this cake last week for a church fundraising auction, and it went for $50. Time constraints meant I didn't photograph it, and since someone else bought it I didn't get to taste it, either. Reports from the eaters were favorable enough, however, to warrant making it again. I didn't take pictures of the process, but here is the final product:


Mmmm, let's look a little more closely:


I'll tell you right now, it tasted every bit as good as it looked. And yes, I use the past tense advisedly--our barbecue crowd polished this thing off in a matter of minutes.

This cake was inspired by a recipe from a couple years back in Cook's Illustrated for Strawberry Cream Cake. I've never actually made the cake with strawberries, but I did make it once with mixed berries (raspberries, boysenberries, marionberries) (huge hit, polished off in its entirety by 7 people), and once with peaches. The peach version was tasty, but not nearly so much as the berry version. It struck me that the tart/acidic punch of the berries was a key component in what made it so good. And what fruit is more tart than rhubarb? But I didn't think the original cake would translate directly into a rhubarb version, so some changes would be necessary.

The berry cream cake has exposed whole berries lining the edges of the filling layers, and no frosting on the sides. But rhubarb doesn't lend itself to this treatment, so I decided I would frost the sides of the cake. The frosting for the original cake was whipped cream stabilized with cream cheese, and it is perfectly dreamy. I knew for sure that I wouldn't tinker with that. The cake in the original recipe was a single layer of chiffon, cut into three layers, but I thought a bit softer cake would better complement the strong rhubarb. So I switched it out for two layers of Fluffy Yellow Cake (also from Cook's), each cut into two layers. For the filling, I used two recipes from The Cook's Dessert Bible: stewed rhubarb and pastry cream. Then I mixed them together for a rhubarb pudding filling.

Now, with pudding, cake, and cream, this cake ends up more or less a trifle without the bowl. The filling tends to make the layers slip, so maybe it would be better in a bowl as a trifle. But however you put the elements together, it's delicious.

Make the rhubarb and pastry cream the night before, so they have plenty of time to chill before assembling the cake.
Stewed Rhubarb
adapted from The Dessert Bible

1 lb rhubarb, trimmed, cleaned, and cut into 1/2-inch pieces
1/2 C sugar
2 T honey
2 T lemon juice

Combine ingredients in a medium saucepan and let sit, stirring occasionally, until the rhubarb has released its juices and most of the sugar is dissolved, a couple of hours. Bring to a boil over medium heat, then cover and simmer for 10 minutes or so. Remove lid and keep simmering, stirring very occasionally, until thick and jammy, 15-20 minutes.

Pastry Cream
adapted from The Dessert Bible

1 pt half and half
6 large egg yolks (reserve whites to make macaroons later!)
1/2 C sugar
3 T flour
1/8 t salt
2 t vanilla

Heat half and half on stovetop or in microwave until just about to simmer. Whisk together flour, sugar and salt, then whisk dry ingredients into the egg yolks in a medium saucepan until smooth and pale yellow. Very slowly add the hot half and half to the yolk mixture, whisking constantly.

Put pan on stove over low heat and heat until mixture reaches 180 degrees, whisking constantly (no kidding, CONSTANTLY, or you will regret it). Strain into a bowl, stir in vanilla, then put waxed paper or plastic wrap directly onto the surface of the pudding and let cool.

Fluffy Yellow Layer Cake
adapted from Cook's Illustrated, March/April 2008

10 oz (about 2 1/2 C) cake flour
1 1/4 t baking powder
1/4 t baking soda
3/4 t table salt
1 3/4 C sugar
10 T unsalted butter, melted and cooled slightly
1 C buttermilk, room temperature
3 T vegetable oil
2 t vanilla
6 large egg yolks + 3 large egg whites, room temperature

The eggs are easier to separate when cold, so put three whites in bowl of stand mixer, three whites in container to save for making macaroons later, and six yolks in a four-cup Pyrex measuring cup with the buttermilk. Let sit for a couple of hours to come to room temperature.

Melt butter and let cool slightly (it took 30 seconds plus just a little stirring to melt room temperature butter in my microwave). Preheat oven to 350 and prepare two nine-inch round cake pans (either baking spray, or butter and flour; the original recipe calls for lining the bottoms of the pans with parchment as well, but I had good luck without). Whisk together flour, 1 1/2 C sugar, baking powder, soda and salt in a medium bowl. Whisk butter, oil and vanilla into measuring cup with buttermilk and egg yolks.

Beat three egg whites with whisk attachment until foamy, then gradually add 1/4 C sugar with mixer running. Scrape sides of bowl, then beat at medium-high speed until mixture just forms stiff peaks (it should still look moist, not dry). Scrape beaten whites into a small bowl, then return mixer bowl to machine.

Dump dry ingredients into mixer bowl. With mixer running at low speed, gradually pour in buttermilk mixture and blend until just incorporated. Scrape sides of bowl, then mix on medium-low speed until smooth, 10-15 seconds. Remove bowl from mixer, and use spatula to gently mix in one-third of the egg whites to lighten the mixture. Then gently fold in remaining egg whites just until no streaks remain. Divide batter between pans, drop pans from 2 inches to dislodge big air bubbles, and put pans in the oven on the middle rack. Bake until a toothpick just comes out clean, about 30-32 minutes, rotating pans after 15 minutes. Cool on rack in pans 10 minutes, then take out of pans and cool completely on rack, at least an hour.

Cheesy Whipped Cream
adapted from Cook's Illustrated, May/June 2006

8 oz cream cheese, room temperature
1/2 C sugar
1 t vanilla
1/8 t salt
1 pt heavy cream

Beat cream cheese, sugar, vanilla and salt in stand mixer with whisk attachment until light and fluffy. Reduce speed to low and add cream in a steady stream. Stop mixer to thoroughly scrape sides, and mix at medium speed until just blended. Then increase speed to medium-high and beat until mixture forms stiff peaks.


To assemble the cake, use a serrated knife to cut each cake layer in half horizontally, holding knife steady and rotating cake. Stir together rhubarb and pastry cream. Put one cake layer on serving plate and top with a thick layer of rhubarb pudding (less than one-third of the total; there will be some left over). Repeat with remaining cake layers. Using a straight icing spatula, spread a thin layer of cheesy cream over the sides of the cake. If it's warm in the kitchen, chill the cake for 10 minutes, then apply a thicker layer to the sides. Scrape remaining cream onto the top of the cake and use spatula to spread to edges. Refrigerate whole cake for a couple of hours before serving.

Saturday, April 25, 2009

Salmon-Asparagus Salad

I've made something similar to this in the past, but somehow never posted about it. I was in Utah this weekend and needed to do something with a filet of Costco salmon. Here's my solution, which also uses fresh in-season asparagus. In late summer and fall, when asparagus isn't so plentiful, it tastes great with green beans.


Salmon-Asparagus Salad
loosely inspired by The Barefoot Contessa Cookbook

1 filet (approx 2.5 lb) salmon
1 large bunch (2 lb? How big are the packages at Costco?) asparagus, ends snapped off and snapped into two-inch pieces

Spray salmon with olive oil and sprinkle with salt and pepper and bake at 400 degrees until just firm and opaque throughout. Let cool to room temperature and then refrigerate. Blanch asparagus pieces in boiling water for 30-90 seconds, depending on thickness of spears. Let cool and refrigerate also.

juice of one lemon
twice as much olive oil as lemon juice
1 pkg fresh dill, leaves stripped and minced (about 3-4 T)
3 T capers, minced
2 ribs celery, diced fine
1/2 red onion, chopped fine
1/2 or more English cucumber, cut into quarter-rounds
salt and freshly ground black pepper to taste

Mix lemon juice, olive oil, dill and capers with some salt and pepper, then stir in remaining ingredients and reserved salmon and asparagus. Adjust seasonings and serve.

Thursday, April 23, 2009

Banana Layer Cake--We Have a Winner!

As promised, I tried again to make the banana layer cake I was imagining: moist, with a strong banana flavor, but not dense like a quickbread. I wanted something rich enough not to cry out for whipped cream or ice cream or any kind of sauce, and I thought it would be nice if chocolate played a role in there somewhere. Eureka. Today I made the Banana Layer Cake recipe from The Gourmet Cookbook (you know, the big yellow one, with the retarded yellow ink color for the internal titling). It turns out a three-layer banana cake with cream cheese frosting and banana slices in the filling. I made it pretty much by the book, with a little less sugar in the frosting, and added a layer of chocolate ganache in the filling on top of the banana slices. It was divine, if possibly a little too rich. You won't want a big slab of this one.
Banana Layer Cake with Cream Cheese Frosting and Banana-Ganache Filling
adapted from The Gourmet Cookbook

Ganache Filling:

6 oz bittersweet chocolate, chopped (or I use chocolate that comes in pastilles, so no chopping required)
6 1/2 oz heavy cream

Put chocolate and cream in a glass bowl and microwave on high for one minute. Stir well, then microwave for 30 more seconds and stir until all chocolate is melted and mixture is smooth and glossy, microwaving for an additional 30 seconds if absolutely necessary. Set aside, stirring occasionally, until room temperature and thick enough to spread easily but not drip or ooze, using refrigerator judiciously to hurry process.

Cake:

2 1/4 C sifted cake flour
3/4 t baking soda
1/2 t baking powder
1/2 t salt
1 C mashed very ripe bananas (about 2 large)
1/4 C plain whole-milk yogurt (I prefer Brown Cow)
1 t vanilla extract
1/2 C unsalted butter, softened
1 C sugar
2 eggs

Preheat oven to 350, and prepare three round cake pans (the original recipe calls for 8-inch pans, but I used 9-inch pans and got thinner layers in less time). Sift flour into measuring cups, then stir together with baking soda, baking powder and salt in a medium bowl. Mash bananas in a small bowl, then whisk in yogurt and vanilla. Set aside both bowls.

Beat butter and sugar at high speed until pale and fluffy, 2-3 minutes. Add eggs one at a time, beating well after each addition. Alternate adding flour and banana mixtures, starting and ending with flour and mixing at low speed just to combine, scraping sides of bowl often.

Divide batter evenly among pans and smooth tops. Bake, switching positions of pans mid-way through for even cooking, 18-22 minutes, until just springy to the touch and a tester comes out clean (15-18 minutes for 9-in layers). Cool in pans on rack for 10 minutes, then invert layers onto racks to cool completely.


Frosting:

8 oz cream cheese, softened
1/2 C unsalted butter, softened
1 t vanilla extract
1/4 t salt
2 1/2-3 C powdered sugar

4 ripe but firm bananas

Beat butter and cream cheese in stand mixture with whisk attachment until light and fluffy, 6-7 minutes. Beat in vanilla and salt, then gradually add sugar, scraping sides of bowl often, until thoroughly blended and fluffy.

To assemble the cake, put one layer, top side down, on cake plate. Put waxed paper under edges of cake to keep plate clean. Spread top of cake with a thin layer of cream cheese frosting, just enough to cover. Slice bananas thinly on the diagonal and arrange slices in a spiral pattern almost to edges of cake. Top bananas with half the ganache, and spread to within 1/2 inch of the edge (not flush with the edge as shown in the picture below--I had more ooze out the sides than would have been ideal). Repeat with second layer, then place third layer on top.


Spread sides of cake with a thin crumb layer of cream cheese frosting to contain filling and keep chocolate streaks from appearing. Refrigerate cake 1/2 hour to firm up crumb layer before proceeding.


Spread a nice 1/4" layer of frosting around the sides of the cake using a straight spatula, then scrape remaining frosting onto top of cake and smoothe to edges.


Refrigerate an hour or two to firm everything up, then serve.