Showing posts with label love and chocolate. Show all posts

Tuesday, November 23, 2010

Chocolate Cheesecake

Just in time for those of you considering less-traditional Thanksgiving desserts.
Killer Chocolate Cheesecake
from Luscious Chocolate Desserts by Lori Longbotham

Crust:
9-oz package chocolate wafers, broken into large pieces with your hands
6 T unsalted butter, melted

Filling:

1 lb bittersweet or semisweet chocolate, chopped (no more than 70% cocoa--I used a mixture of half 60% and half 70%)
1/4 C unsalted butter
2 T unsweetened cocoa powder
3 8-oz packages cream cheese, at room temperature
1 C sugar
4 large eggs
pinch of salt
1 1/2 C sour cream, at room temperature
2 t pure vanilla extract

Before starting anything else, get the cream cheese, sour cream and eggs out so they can come to room temperature for a couple of hours. Then melt the chocolate and butter for the filling in a double boiler or bain-marie (steel bowl set over barely simmering water), whisking until smooth, then whisking in cocoa powder and removing from the heat to cool to room temperature.


Make sure the rack is in the middle of the oven, and preheat it to 350. Butter a 9-inch tall (3" deep) springform pan and wrap the outside with a double layer of heavy-duty aluminum foil. Have a roasting pan (big enough to hold the springform pan in about an inch and a half of water) ready, and put a kettle of water on to boil for the water bath.

Pulse the chocolate wafers in a food processor until finely ground. Add the melted butter and process until just blended. Press mixture into the bottom of the pan. Bake for 8-10 minutes, until set, then let cool on a wire rack.


Beat the cream cheese and sugar in a stand mixer, starting on low speed and increasing to medium-high, until light and fluffy.


Add the eggs one at a time, beating well after each addition and scraping the sides of the bowl as needed. Add salt, then beat in the chocolate mixture until just smooth. Add the sour cream and vanilla and beat until smooth, scraping the sides and bottom of the bowl to ensure all ingredients are fully incorporated. If you aren't too nervous about the raw eggs, find a helper to lick the beater.


Transfer the filling to the springform pan. Set the pan in the roasting pan, place it in the oven, and carefully pour in enough boiling water to reach halfway up the sides of the pan.


Bake for 45 minutes, or until the center is almost set but still slightly jiggly; do not overbake, as the cheesecake will firm as it cools. If you really, really think it's too jiggly, bake for an additional five minutes but no longer (I did an extra 10 and regretted it). Remove the roasting pan from the oven and let the cheesecake cool in the water bath for 15 minutes.

Remove the springform pan from the water bath and let cool completely on a wire rack.


Remove the foil and refrigerate the cheesecake, loosely covered, until thoroughly chilled, 12 hours or overnight.

To serve, let the cheesecake stand at room temperature for 20 minutes. Remove the pan sides, smooth the sides of the cheesecake with a butter knife, and cut into wedges. Very small wedges--this thing is RICH. An inch is about perfect, so this cheesecake can serve at least two dozen people.

Saturday, July 25, 2009

DIVINE Chocolate Cake

We celebrated the Wizard's birthday tonight in the back yard. Once again we had pulled pork sandwiches* with cole slaw, corn on the cob, watermelon, a few chips, and some delicious baked beans brought by friends (need to get that recipe!).

Dessert, though, oooooohhhhhhh. I made a recipe that's been in my queue for quite a while: Chocolate-Buttermilk Layer Cake. It appeared in Portland Monthly in February of 2008. Instead of both filling and frosting it with ganache, I cut the cake into four layers and used ganache for all three layers of filling, and frosted the top and sides with Fluffy Cream Cheese Frosting. We also had The Cupcakes, also with cream cheese frosting, because we had enough guests that just one dessert I thought would not be sufficient. As it turned out, just the cake would have been enough if I had cut it in the small pieces its richness warranted. The size pictured is too big even for a chocoholic like me, and even with vanilla ice cream to cut the richness.


Chocolate-Buttermilk Layer Cake
adapated from Portland Monthly Mag

3 C unbleached all-purpose flour
2 1/2 C sugar
1 1/2 T baking soda
1/2 t salt
1 C cocoa powder, sifted
1 1/3 C canola oil
1 1/2 C buttermilk
3 large eggs
1 1/2 C freshly-brewed, extra-strong hot coffee (I made instant coffee at about 150% the strength recommended on the jar)
1 t vanilla
16 oz bittersweet chocolate (24 oz if using for one layer of filling and top and sides of cake)
1 C heavy cream (1 1/2 C if using for one layer of filling and top and sides of cake)

1. Preheat oven to 350 degrees. Coat two 9-inch round cake pans with nonstick cooking spray and line the bottoms with parchment paper.

2. Put dry ingredients in bowl of stand mixer, and mix with paddle attachment at low speed to combine. Keep mixer on low speed and add oil, buttermilk, and eggs one at a time. Add hot coffee in a thin stream, pouring down the side of the bowl. Add vanilla, scrape sides of bowl with rubber spatula, and mix just until smooth. Divide between pans and bake until a toothpick comes out of the center with moist crumbs, 40-45 minutes (original recipe says 30-35, but the cake wasn't close to done at that point). Let cool in pans 10-15 minutes, then transfer to wire rack to cool completely, peeling parchment off bottoms of layers but putting cakes right side up on rack.

3. Put cream and chocolate (chopped if necessary) into a microwave-safe bowl and microwave on high for one minute. Stir well, then microwave for an additional 30 seconds. Stir until all the chocolate is melted and the mixture is glossy and dark, zapping another 15-30 seconds if absolutely necessary. Let cool to room temperature, stirring occasionally.

4. Trim cooled cakes just a little, so they're not too domed, then carefully cut in half horizontally with a serrated bread knife. Before separating the layers, cut a small notch in the side to line up when reassembling the layers after filling, since almost no one cuts that perfectly. Put one bottom layer on a cake plate, placing strips of waxed paper under the edges. Top with one-third of the ganache, and spread to within one half-inch of the edge. Place matching top layer, lining up notch, and top with another third of the ganache. Repeat with second split layer of the cake. Put filled layers of cake in fridge for 15-30 minutes to set ganache a little before icing.

5. Apply crumb coat of cream cheese frosting to sides and top of cake. Refrigerate for 15 minutes more, then spread remaining frosting on top and sides of cake. Refrigerate a couple of hours before serving.

*You don't need a recipe for the pulled pork, right? I bought a boneless Boston butt (big pork shoulder roast) from our favorite farmers' market pork purveyor, and coated it with a little oil and salt and pepper. I made a big fire in one side of the grill (charcoal, of course) and seared the snot out of it last night, then moved it to the cool side for 60-90 minutes. Around midnight, I put it in a roasting pan, covered it tightly with foil, and moved it into a 250-degree oven overnight. At 9 this morning I wrapped it tightly in foil and put it into a cooler to rest and cool slowly until this afternoon. It was just cool enough to handle, so I separated out the fat and the crispy parts with my fingers, then shredded the meat with two forks. I mixed in a little sauce, and served more on the side. This time the sauce was bottled (Cook's Illustrated's top choice, Bulls-Eye, now made without HFCS!), but last year I made a ketchup-based sauce from a Cook's Illustrated recipe. The coleslaw was made using the recipe on the side of the bagged coleslaw package. Maybe for a future year (we'll have this for the Wizard's birthday every year as long as he goes along) I'll make a fancier scratch coleslaw, and bring back that scratch sauce.

Thursday, April 23, 2009

Banana Layer Cake--We Have a Winner!

As promised, I tried again to make the banana layer cake I was imagining: moist, with a strong banana flavor, but not dense like a quickbread. I wanted something rich enough not to cry out for whipped cream or ice cream or any kind of sauce, and I thought it would be nice if chocolate played a role in there somewhere. Eureka. Today I made the Banana Layer Cake recipe from The Gourmet Cookbook (you know, the big yellow one, with the retarded yellow ink color for the internal titling). It turns out a three-layer banana cake with cream cheese frosting and banana slices in the filling. I made it pretty much by the book, with a little less sugar in the frosting, and added a layer of chocolate ganache in the filling on top of the banana slices. It was divine, if possibly a little too rich. You won't want a big slab of this one.
Banana Layer Cake with Cream Cheese Frosting and Banana-Ganache Filling
adapted from The Gourmet Cookbook

Ganache Filling:

6 oz bittersweet chocolate, chopped (or I use chocolate that comes in pastilles, so no chopping required)
6 1/2 oz heavy cream

Put chocolate and cream in a glass bowl and microwave on high for one minute. Stir well, then microwave for 30 more seconds and stir until all chocolate is melted and mixture is smooth and glossy, microwaving for an additional 30 seconds if absolutely necessary. Set aside, stirring occasionally, until room temperature and thick enough to spread easily but not drip or ooze, using refrigerator judiciously to hurry process.

Cake:

2 1/4 C sifted cake flour
3/4 t baking soda
1/2 t baking powder
1/2 t salt
1 C mashed very ripe bananas (about 2 large)
1/4 C plain whole-milk yogurt (I prefer Brown Cow)
1 t vanilla extract
1/2 C unsalted butter, softened
1 C sugar
2 eggs

Preheat oven to 350, and prepare three round cake pans (the original recipe calls for 8-inch pans, but I used 9-inch pans and got thinner layers in less time). Sift flour into measuring cups, then stir together with baking soda, baking powder and salt in a medium bowl. Mash bananas in a small bowl, then whisk in yogurt and vanilla. Set aside both bowls.

Beat butter and sugar at high speed until pale and fluffy, 2-3 minutes. Add eggs one at a time, beating well after each addition. Alternate adding flour and banana mixtures, starting and ending with flour and mixing at low speed just to combine, scraping sides of bowl often.

Divide batter evenly among pans and smooth tops. Bake, switching positions of pans mid-way through for even cooking, 18-22 minutes, until just springy to the touch and a tester comes out clean (15-18 minutes for 9-in layers). Cool in pans on rack for 10 minutes, then invert layers onto racks to cool completely.


Frosting:

8 oz cream cheese, softened
1/2 C unsalted butter, softened
1 t vanilla extract
1/4 t salt
2 1/2-3 C powdered sugar

4 ripe but firm bananas

Beat butter and cream cheese in stand mixture with whisk attachment until light and fluffy, 6-7 minutes. Beat in vanilla and salt, then gradually add sugar, scraping sides of bowl often, until thoroughly blended and fluffy.

To assemble the cake, put one layer, top side down, on cake plate. Put waxed paper under edges of cake to keep plate clean. Spread top of cake with a thin layer of cream cheese frosting, just enough to cover. Slice bananas thinly on the diagonal and arrange slices in a spiral pattern almost to edges of cake. Top bananas with half the ganache, and spread to within 1/2 inch of the edge (not flush with the edge as shown in the picture below--I had more ooze out the sides than would have been ideal). Repeat with second layer, then place third layer on top.


Spread sides of cake with a thin crumb layer of cream cheese frosting to contain filling and keep chocolate streaks from appearing. Refrigerate cake 1/2 hour to firm up crumb layer before proceeding.


Spread a nice 1/4" layer of frosting around the sides of the cake using a straight spatula, then scrape remaining frosting onto top of cake and smoothe to edges.


Refrigerate an hour or two to firm everything up, then serve.


Thursday, April 16, 2009

Banana Layer Cake #2


I tried that banana layer cake again (my notes from the first attempt here, with a link to the original recipe. This time I used (per Lindsey's suggestion) four whole eggs instead of seven egg whites. Unfortunately the cake was still (to my taste) too dry and too tender, and not banana-y enough. The ganache turned out a little better, but still not perfect. I used plain diced roasted hazelnuts instead of candied pecans in the filling, and that was a total winner of a choice. To solve the cake issues (and because banana desserts still sound good to me), I've now got my eye on a banana layer cake recipe in The Gourmet Cookbook. It's got less sugar and more banana, no cinnamon (which I was starting to find distracting), and uses cream cheese frosting, with sliced bananas between the layers. Sounds good to me. I'm debating whether I'll try to retain some chocolate and hazelnut elements. What do you think (other than Di who doesn't like bananas)?

Thursday, March 12, 2009

Chocolate Bread Pudding

So, I had a little leftover bread from a dinner a while back, and I purposely let it get stale, really, really stale, to make chocolate bread pudding. I couldn't find one recipe that sounded just right, so I improvised based on a couple of different ones, including the Chocolate-Banana Bread Pudding of last month. The only thing bad about how it turned out is that it is now all gone.
Chocolate Bread Pudding

3 C stale bread, cut or broken into pieces no larger than an inch or so
4 egg yolks (I used four because I needed four more whites for another recipe, but 3 would probably work fine)
2/3 C sugar
pinch salt
1 C heavy cream
4 oz bittersweet chocolate, chopped
2 C whole milk

Put bread in souffle dish (mine is a pretty standard size, I think about 8" across). Whisk egg yolks, sugar and salt in stand mixer on medium-high speed until light and fluffy-ish, at least a minute. In the mean time, put chocolate and enough cream to just cover (2/3-3/4 C, depending on shape of bowl) in glass bowl and microwave on high for one minute. Stir until all chocolate is melted and mixture is smooth, then stir in the rest of the cream. With mixer running, add milk to egg yolk-sugar mixture and mix until combined. Scrape sides and bottom of the bowl, then add chocolate-cream mixture and mix until well blended, scraping sides and bottom of bowl as needed.

Pour custard mixture over bread in souffle dish. Press bread down into custard and let soak as long as you can, up to overnight (in the fridge if longer than an hour).

When ready to bake, preheat oven to 325 degrees. Trim a piece of parchment paper to fit in mouth of souffle dish, and lay it right on top of pudding. Cover dish tightly with foil. Bake 40-45 minutes covered, then remove foil and parchment and bake another 40-45 minutes uncovered. Let stand 20 minutes before serving to finish cooking.


As you can see from the picture, I didn't break my bread into small enough pieces. I just whacked its bag on the counter, but I should have taken a mallet to it. I also didn't take enough time for soaking, so there was some unchocolatey bread at the middle of the larger pieces. Not fatal flaws, in any event, but something I will do differently next time.

Sunday, February 8, 2009

A Surfeit of Sugar

I've had a couple of banana-chocolate recipes in my queue, and this weekend provided an excuse to make them both--dinner at my brother's for them, us and another family. Even better, I discovered when I got out the recipes to plan and prep, one called for seven egg yolks, and the other for seven egg whites. You don't get that kind of synchronicity every day. So Saturday after dinner and bedtime, I started putting together a Ganache-Frosted Praline-Filled Banana Layer Cake and Banana Chocolate Bread Pudding.

The cake came from Lindsey over at Cafe Johnsonia. I skipped the white chocolate in the ganache in favor of the 61% Belgian Lever du Soleil I use for everything. Next time I'll use a different ganache recipe, because the straight-across substitution didn't work great--it was too stiff and didn't spread smoothly. Like Lindsey, I didn't deep-fry the sugared pecans. Too much work, too much mess. Instead, I used an easy candied pecan recipe that appeared in the newspaper as part of another recipe a while back. If I were to use them for this recipe again, I would leave out the nutmeg, which wasn't perfectly harmonious with the other flavors here. My only other complaint was that the cake was slightly dry. A minute or two less baking probably would have helped, but I think the batter would also have benefited from a yolk or two, not just egg whites.

Puréeing the banana and milk for the batter.


Adding the egg whites to the creamed butter and sugar.


The finished batter.


The baked cakes.


The pecans.


Spiced Candied Pecans

1/2 C granulated or superfine sugar
1 t ground cinnamon
1/4 t ground nutmeg (optional)
2 C pecan halves

Preheat oven to 300 degrees. Line a rimmed baking sheet with parchment. Stir together sugar and spices in a medium bowl. Rinse pecans with cold water in a colander, then shake off excess. Toss pecans in sugar-spice mixture to coat, then spread in a single layer on the baking sheet. Bake until sugar has melted and they're starting to smell a little toasty, 15-20 minutes. Let cool, then store in an airtight container for up to a couple of days.

The beginnings of the ganache, melted in the microwave for a minute, then 30 seconds, then 20 seconds on high, stirring in between until smooth.


After whipping in the rest of the cream.


The filling, with chopped candied pecans folded in.


The final product.


Now, what you've all been waiting for:
Banana Chocolate Bread Pudding
adapted from The Dessert Bible by Christopher Kimball

6 C 1-in cubes bread (rustic white or challah; I used 1/2 a Pearl Bakery Paesano)
4 oz bittersweet chocolate, chopped (I used the Lever du Soleil, which comes in discs)
7 large egg yolks
3/4 C sugar
2 C heavy cream
2 t vanilla
2 C whole milk
2 ripe bananas

Put about two-thirds of the bread cubes into a baking dish with high sides, either a 8x11" rectangle or two 7.5" (interior diameter) souffle dishes (I did the math on these and they were just about exactly equivalent in terms of volume). Sprinkle chocolate on top, then cover with remaining bread.


Whisk egg yolks with sugar for one minute, then whisk in cream, vanilla and milk. Put chunks of peeled banana in food processor and pulse to mash. Add 1 C of the cream mixture and process until completely smooth, scraping sides as necessary.


Whisk banana mixture into bowl with remaining cream mixture, and then pour over bread and chocolate. Press down with a rubber spatula. Let soak for at least 10 minutes and up to 24 hours (I pressed plastic wrap directly onto the surface, weighted it down with discs of chilling cookie dough, and left it in the fridge overnight).


When ready to bake, preheat oven to 325 degrees. Press a piece of trimmed buttered parchment directly onto the surface of the pudding, then cover dish tightly with foil. Bake for 40 minutes, then remove foil and paper and bake for 40-45 minutes more, until slightly puffed and browned, and no more than the barest bit jiggly in the middle. Remove from oven and let stand 20 minutes before serving. If you really, really want to, you can serve it with caramel and/or chocolate sauce, but it is mouth-wateringly divine without any sauce at all.

Wednesday, December 24, 2008

Bûche de Noël

We had a lovely Christmas Eve. My family traditionally does the big meal on Christmas Eve, not Christmas Day. I planned a simple menu, and farmed out most of the side dishes, so I could concentrate on dessert. And what a dessert it was!

But first . . .

Here are the boys, decorating makeshift paper-bag Christmas stockings so Santa would have some place to put the small amount of candy he was able to purchase at Fred Meyer on our wild snowy four-wheel-drive ride on Monday. I have the materials to make wonderful stockings for the whole family, but haven't yet gotten around to putting them together. You know how it goes.


Here is the grownup table, decorated with pine cones, velvet cord and bows, and red glass votives and bud vases, the vases filled with snippets of fir.


And here is the kid table, complete with kids (oldest nephew Rico was sitting with the grownups, along with his sister). Don't you just love how proto-teenager Newton refuses to smile for pictures? Grr. Hope Santa puts a little piece of coal in his stocking for the sour puss he's got in every picture lately.


Finally, here is the bûche! I didn't take any pictures of the process, because frankly there were about ten times when I was convinced that it wasn't going to work. But it did, more or less. I followed Julia Child's instructions in The Way to Cook, baking a French sponge cake in a jelly roll pan, and filling and frosting the cake with a chocolate mousse based on an Italian meringue. I also used the meringue to make the mushrooms. (I did skip the caramel veil.) Next year I'll make a different cake (there wasn't enough of this one to balance out the mousse), but the mousse was pretty divine. And having it based on meringue (though it didn't taste at all meringue-y) meant not having to make a separate meringue for the mushrooms, which I think are essential. If anyone's interested in the meringue/mousse instructions, let me know and I'll edit this post to add them.


Hope your holiday food is delectable, too! Later this week I'll try to make (and post about) the most fantastic latkes. This year my experiment will be adding a little red sweet potato and seeing what happens. Mmmmmm. I'll also make my Split Pea Soup from the hambone left from today's dinner (which also included Mormon classic funeral potatoes and roasted green beans with shallot and lemon zest and pecan-pumpkin seed rolls, none of which were of my making).

Wednesday, September 3, 2008

Birthday Treats

Newton recently had a birthday, for which the celebrations ended up stretching more than a week, with his "friend" party the Saturday before and his family party the weekend after. Here's a shot I recently snapped for his soccer ID card (!):


The day of his birthday party, he had the world's loosest tooth. He wouldn't let me pull it, and wouldn't pull it himself. He would wiggle it with his tongue, but otherwise just moped around the house all morning, not eating. I finally made him sit down and eat dry Peanut Butter Crunch and blueberries (his breakfast he never ate, which had been sitting there waiting for its milk), popping them in individually so as not to bump the tooth. Thankfully, it fell out at the beginning of the party when he wiped the back of his hand across his mouth. I shudder to think about the cloud of doom that tooth would have thrown over the party otherwise. Here's the tooth hanging by the tiniest thread, turned around 180 degrees:


At the party the boys (he did invite a couple of girls, but they didn't come) played on the slip n' slide, swapped books, and ate homemade ice cream sandwiches (The Thin with vanilla or chocolate-peanut butter ice cream). I whipped up a platter of crudités (multicolored cherry tomatoes, jicama, blanched green and yellow beans, cucumber, carrots) with garlic herb dip for the grownups.


Newton's actual birthday was a busy one. All the kids had swimming lessons in the morning, and then Newton had his well-child checkup (at 8 years old, 59 lbs = 59th percentile!). After a quick lunch, he had a play date with a friend from school which included soccer in the park and a trip to Ben & Jerry's. In the evening was Newton's back-to-school ice cream social, and then he went to a Portland Beavers game with another school friend. Wow.

My family has a tradition of letting the birthday person pick the menu on his or her day. Since Newton's day was so full, we postponed the meal picking to the weekend. For Sunday's dinner with just our family, we had spaghetti carbonara, and then homemade Peanut Butter Fudge ice cream for dessert.


Peanut Butter Fudge Ice Cream
adapted from the Ben & Jerry's Ice Cream Book
makes about 1 quart

2 eggs
3/4 C sugar
1/4 t salt
2 C heavy cream
1 C milk
1/3 C creamy peanut butter
chopped peanuts (optional--I didn't use them because Newton doesn't like nuts)
chocolate fudge or ganache (I used the ganache from the cupcakes recipe below)

Whisk eggs in standing mixer until foaming, then gradually add sugar and salt. Keep whisking at medium speed until light yellow and fluffy, then gradually whisk in cream and milk. Transfer mixture to medium saucepan and cook over medium heat until the mixture reaches 160 degrees on an instant-read thermometer (you can skip this step if you don't mind eating raw eggs or are in a big hurry). Remove from heat, then add a little of the cream base at a time to the peanut butter in a small bowl, whisking to blend. When thoroughly mixed, let cool almost to room temperature and then chill in fridge overnight (or less time if you didn't cook it).

The next day, freeze in an ice cream maker according to machine's instructions, adding pieces of fudge or ganache late in the process (so they don't break down or sink to the bottom). If you're using an ice cream maker that doesn't let you add ingredients in the middle of the process, layer in the fudge/ganache pieces when you transfer the ice cream to another container. Let cure in freezer for at least several hours and preferably overnight (yes, two overnights--good ice cream means planning ahead!).

Monday was the family dinner, and we just had simple grilled fare in the back yard: buffalo burgers on whole wheat buns, tomatoes and lettuce from J&J's garden, Walla Walla sweets their friends had brought them, corn on the cob, French potato salad with blanched green and yellow beans, corn, and more of those garden tomatoes, watermelon, peaches, and potato chips with ranch dip. For dessert, the famous cupcakes made a reappearance. Inexplicably, Newton wanted some without ganache filling (!), so I made one dozen (minis) without, and two dozen with. Again, frosted with cream cheese frosting. I've figured out the secret to perfect cream cheese frosting! Here is how I made it this time, and it turned out PERFECT.


Fluffy Cream Cheese Frosting

8 oz cream cheese
1/2 C unsalted butter
1/4 t salt
1/2 t vanilla
1-1 1/2 C powdered sugar

The cream cheese and butter should be softened to cool room temperature, just under 70 degrees. Beat them in stand mixer with whisk attachment until well blended, smooth and creamy, scraping down bowl periodically and adding salt and vanilla mid-way. Then add powdered sugar and keep beating and scraping until it's light and fluffy.

RESIST the impulse to add more sugar! It will just make it sweeter and hide the cream cheese flavor. I know because I made cream cheese frosting for the Wizard's birthday cupcakes, and it was too sweet and not cheesy enough.

You know what's crazy? Newton's birthday food is not yet done. Another tradition in my family is to have waffles with fruit and ice cream for birthday breakfasts. Newton wants peaches. So, this coming weekend we'll have sourdough waffles with buttermilk syrup, peaches, and vanilla ice cream. Mmmmmmmmm.

Monday, April 14, 2008

Delicious

I made the cupcakes for a bake sale fundraiser at church, and finally remembered to take a picture. I contributed two boxes of a dozen minis each, and one box sold for $25 and one for $30. Yes, there was a bit of a bidding war. They were filled with ganache and topped with cream cheese frosting.


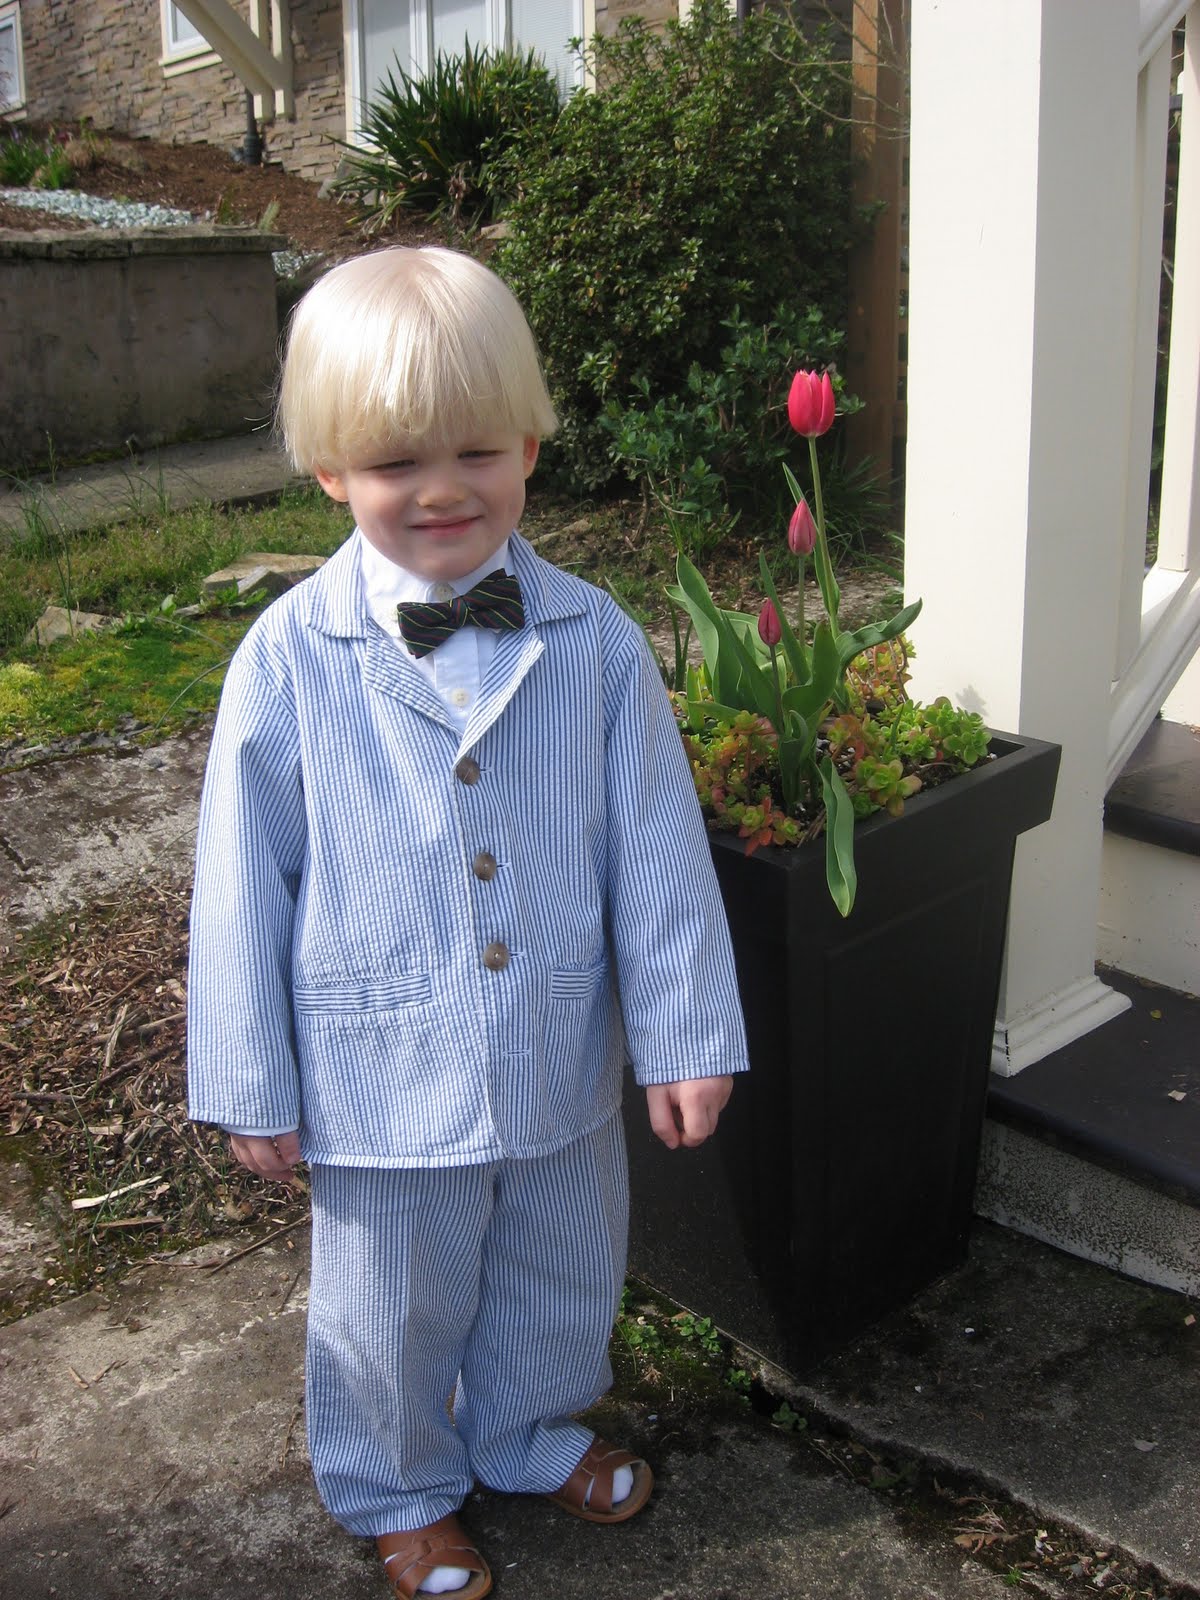
And here's something else delicious from the weekend: the Wizard in the seersucker suit that used to be his brother's. I originally bought it at a resale shop. Newton wore it with a pale yellow shirt which has gone missing in the intervening years. I suppose he could wear a lemon yellow shirt that's getting too small, but yesterday he just wore a white one.


Mavis's birthday was last Friday, and we've managed to string out the celebrating just a little bit. Friday Mavis's dad stayed with the kids while we went out to dinner. Mavis wanted Indian food, so we went to Vindalho, and it was simply fantastic. I brought my leftovers home, and today for lunch Mavis's dad and I shared toasted cheese topped with various chutneys: fresh coriander (aka cilantro), red onion-date and pear-ginger. Wow.

Sunday evening we had J&J and crew over for dinner, and Mavis's dad made a Moroccan couscous with chicken and root vegetables, spiced with cinnamon (and other spices too, but the cinnamon was predominant). For dessert we had brownie sundaes, which were good in spite of the brownies being overcooked due to a timer/attention issue.

Tuesday, March 25, 2008

Happy Easter!


Newton, the Wizard (Whizzer?) and Cindy Lou. The reasons for calling the bigger guy Newton I think are pretty obvious. Plus our street used to be called Newton Street before the big renaming/numbering going on 100 years ago. The little guy's name needs a little more explanation. One of his favorite things is to "talk 'bout wedders." He'll say each letter of the alphabet and then one to several words starting with that letter. The first time he said, "Ell, wizard," it kind of threw me for a minute. The boys' shirts and the baby's sweater were all purchased at resale. Yay for reuse!

We hosted Easter dinner with J&J and fam, plus a couple of other friends. I made the classic ham (because it's easy!) and scalloped potatoes, J brought broccoli, and for some reason I thought we needed three desserts: ganache-filled cupcakes with cream cheese frosting, chocolate pots, and spritz cookies. Often when I am overambitious like this one or more gets tossed by the wayside, but this time I finished all three without feeling like a stress case. Helps that they were all really easy.

The chocolate pots were a recipe from Real Simple from a while back, basically just a scratch chocolate pudding. I put them in adorable Easter egg-shaped ramekins I got from the Crate & Barrel outlet a few years ago.
Chocolate Pots

2/3 C sugar
2 T cornstarch
1/8 t kosher salt
3 C whole milk
4 large egg yolks
1/2 t vanilla
6 oz bittersweet chocolate
cocoa powder for garnish (optional)

Mix sugar, cornstarch and salt in medium saucepan. Add 1/3 C of the milk, whisking until smooth, then add remainder of milk and egg yolks. Cook over low heat, stirring constantly (or nearly so) until thickened, about 180 degrees. Do not boil. Remove from heat and add vanilla and chocolate, stirring until chocolate is melted. Pour into ramekins and chill 2-48 hours. Sprinkle with cocoa powder before serving if desired.

The recipe calls for 8 4-oz ramekins, but as you can see in the picture, I used 11. I don't know if the recipe testers just filled them fuller, or if my ramekins are slightly smaller than 4 oz.


The cupcakes were a redo from a while back, only this time I decided to frost them with cream cheese frosting, tinted pink. I'm sad I didn't get a picture of the finished product--I actually went to the effort of piping the frosting, and then they were topped with these cute Easter sprinkles I've had hanging around in the cupboard for just such an opportunity (along with the Easter-egg printed wrappers hidden by the tin). I'm not sure whether I like them better with the frosting or the ganache. Certainly the frosting is more seasonally adaptable.


The spritz cookies are from a basic recipe I got from my mom. It's not the one in the Betty Crocker Cookie Book--that one has never worked right for me. The color (from violet gel food coloring) turned out a little odd--I wonder if it would have been nicer if I had used bleached flour? Not that I generally would use bleached flour for anything (although the cupcake recipe calls for cake flour, which is usually bleached).


The scalloped potatoes came from Cook's Illustrated, only doubled and some of the potatoes substituted with garnet sweet potatoes. Here's how I made it:
Scalloped Orange-and-White Potatoes
makes a 10x14 inch Pyrex pan's worth

I used the food processor for the onion, potatoes and sweet potatoes, and cheese, scraping but not rinsing in between. Very efficient.

2 T unsalted butter
1 medium onion, chopped fine
2 medium cloves garlic, pressed
1 t fresh thyme leaves
2 1/2 t salt
1/2 t ground black pepper (accidentally omitted)
3-3.5 lb russet potatoes, peeled and sliced 1/8 inch thick
2 lb garnet "yams," peeled and sliced 1/8 inch thick
2 C chicken broth (from about 1/2 C homemade concentrated stock)
2 C heavy cream
2 bay leaves (again, accidentally omitted)
8 oz shredded sharp cheddar cheese

Preheat oven to 425 degrees. Melt butter in large Dutch oven (my favorite 6-qt one was a bit small to hold everything and still allow for stirring) over medium-high heat until foaming subsides. Sauté onion until soft and beginning to brown, then add garlic, thyme, and salt and pepper and cook for another 30 seconds or so. Add potatoes, sweet potatoes, liquid and bay leaves and bring to a simmer. Reduce heat, cover, and cook until potatoes are not quite done (barely pokable but still on the stiff side). Transfer mixture to baking dish (removing bay leaves), sprinkle with cheese, and bake until slightly browned and bubbly, about 15 minutes. Let cool 10 minutes before serving.

They turned out a bit runnier than I would have liked--next time I think I'll reduce the chicken broth. They also got a bit overcooked because the oven (from which we had just pulled the ham) wasn't quite ready when they were, so they cooked on the stove a bit longer. The sweet potatoes were fabulous in there, though--next time I think I'll try an even larger percentage substitution.


One item from dinner that didn't make it into the photo was my family's traditional Ham Sauce, made from sweetened whipped cream, a little mayonnaise, dry mustard (for kick), and yellow mustard (for color). Nothing like fat and sugar to make everything taste better, right?

Thursday, February 28, 2008

Best Ice Cream Topper Ever

That is, if you like stuff on your ice cream (I do). I put these on any kind of ice cream compatible with chocolate--lately, Mint Chocolate Chip and Espresso Mocha. And apparently (I only know this because of where I found this image), they're vegan. Who knew?

Wednesday, February 20, 2008

The Great Roast Chicken Trials

For various reasons (farmers' market not in season, all the other reasons why one should avoid eating too much red meat), we've been eating more chicken lately. There have recently been a couple of intriguing takes on the roast chicken in Cook's, so I decided to try them, along with the method I used to use when I had a great farmers' market source for poultry, and decide which one we liked best.

The first method was for French roast chicken in a pot--the perfect opportunity to use the robin's egg blue Martha Stewart Collection enameled cast iron dutch oven I got for Christmas. Before I had even tried the other methods, I was leaning toward choosing this one as the default, because it's dead easy.
French Roast Chicken in a Pot

4.5-5.5 lb chicken
kosher salt and fresh-ground black pepper
1 T olive oil
1 med onion, chopped medium
1 rib celery, chopped medium
3 cloves garlic, peeled
1 sprig rosemary

Preheat oven to 250. Remove giblets from chicken, pat dry, and season with salt and pepper. Bring oil to just smoking over medium-high heat in dutch oven (mine is 7.5 qt). Add chicken, breast side down, and put vegetables and rosemary (I think I'll try thyme next time) in pot around it. Brown well, then flip over and brown the backside, stirring veggies occasionally. Then cover with foil and put the lid on (Cook's says the foil helps create a tighter seal), and pop in the oven for 80-110 minutes, until the chicken is 160 in the breast and 175 in the thigh.

Like I said, dead easy. It was also deliciously moist. Cook's says to strain the veggies out of the exuded juices, degrease, add a little lemon juice and serve alongside the chicken, but I skipped this. I did strain and degrease the juices (about a cup), but I saved them to add to the stock I plan on making in a few days.

The next trial was of Crisp-Skinned Roast Chicken, from the March-April 2008 Cook's. From the get-go this one has a disadvantage in that it requires some advance prep, always hard for me to remember to do (I ended up doing it at about 1 am last night--definitely not ideal). But it promised ultra-crisp skin, which I knew would be a big hit with Number One.
Crisp-Skinned Roast Chicken

3.5-4.5 lb chicken
1 T kosher salt
1 t baking powder
1/2 t ground black pepper

Combine dry ingredients in a small bowl. Pat chicken dry. Using a sharp paring knife, cut four one-inch slits in the back skin of the chicken (alongside the spine). Use your finger or a wooden spoon handle to loosen the skin, front and back and legs. Then flip it over and use a skewer to poke 15-20 holes in the skin of the breasts and drumsticks. Pat dry again. Sprinkle salt mixture over bird and rub it in with your hands. Put chicken in roasting rack in pan (they say rimmed cookie sheet, but frankly my roasting pan is smaller) and refrigerate, uncovered, 12-24 hours.

Put oven rack on lowest position and preheat oven to 450. Tear off a sheet of foil big enough to mostly cover the bottom of your roasting pan, and poke holes in it with a paring knife about 1.5 inches apart. Put the foil loosely in the pan, and put the rack on top of it. Flip chicken breast side down, and roast for 25 minutes.

Take pan out of oven and flip chicken onto its back (they say to use wads of paper towels, but I used my turkey-flipping forks and they worked just great). Put it back in the oven and roast until the breast is 135 degrees, about 15-25 minutes.

Increase oven temperature to 500 degrees, and roast until the skin is brown and crisp, and the temperature is 160 in the breast and 175 in the thigh, 10-20 minutes. Transfer chicken to cutting board and let rest, uncovered, 20 minutes, then serve.

Once again, we had a deliciously juicy chicken. I wasn't blown away by the skin, though. Yes, it was pretty brown and pretty crisp, but there was just the slightest hint of chemical aftertaste from the baking powder, and it was a bit more hands-on and time-consuming in the prep than I would have liked. I haven't fully polled the boys, but I suspect this will not become a regular (since as the cook I have more votes).

Here is the chicken the night before, after rubbing with the salt mixture.


Here it is the next afternoon, after about 16 hours in the fridge drying out.


And here are the remains after we were done eating (sorry no pic of the golden glory!).


I served it with orange and green mashed potatoes (the kale was actually dark purple, not green, and stained the onions in the sauté) and clementines,


and Ganache-Filled and Frosted Cupcakes for dessert. Yum.